New customer registration
5 minute read
Registration
This section explains how to register as a new customer in CloudHub. To become a customer, you must place a product order in any case. You can create your account (the actual registration) at two different points in time:
| Timing | When is it suitable? |
|---|---|
| In advance, via the Sign in button | You want to create an account first and place your order afterwards. |
| During the ordering process | You already know which product you need and register only when prompted to do so during the ordering process. |
Note: You only need a user account after placing your order. You can therefore view and configure CloudHub and its products without signing in first.
Option 1: Registration in advance, via the Sign in button
1. Open the sign-in page
- Open CloudHub.
- Click Sign in in the top right corner.
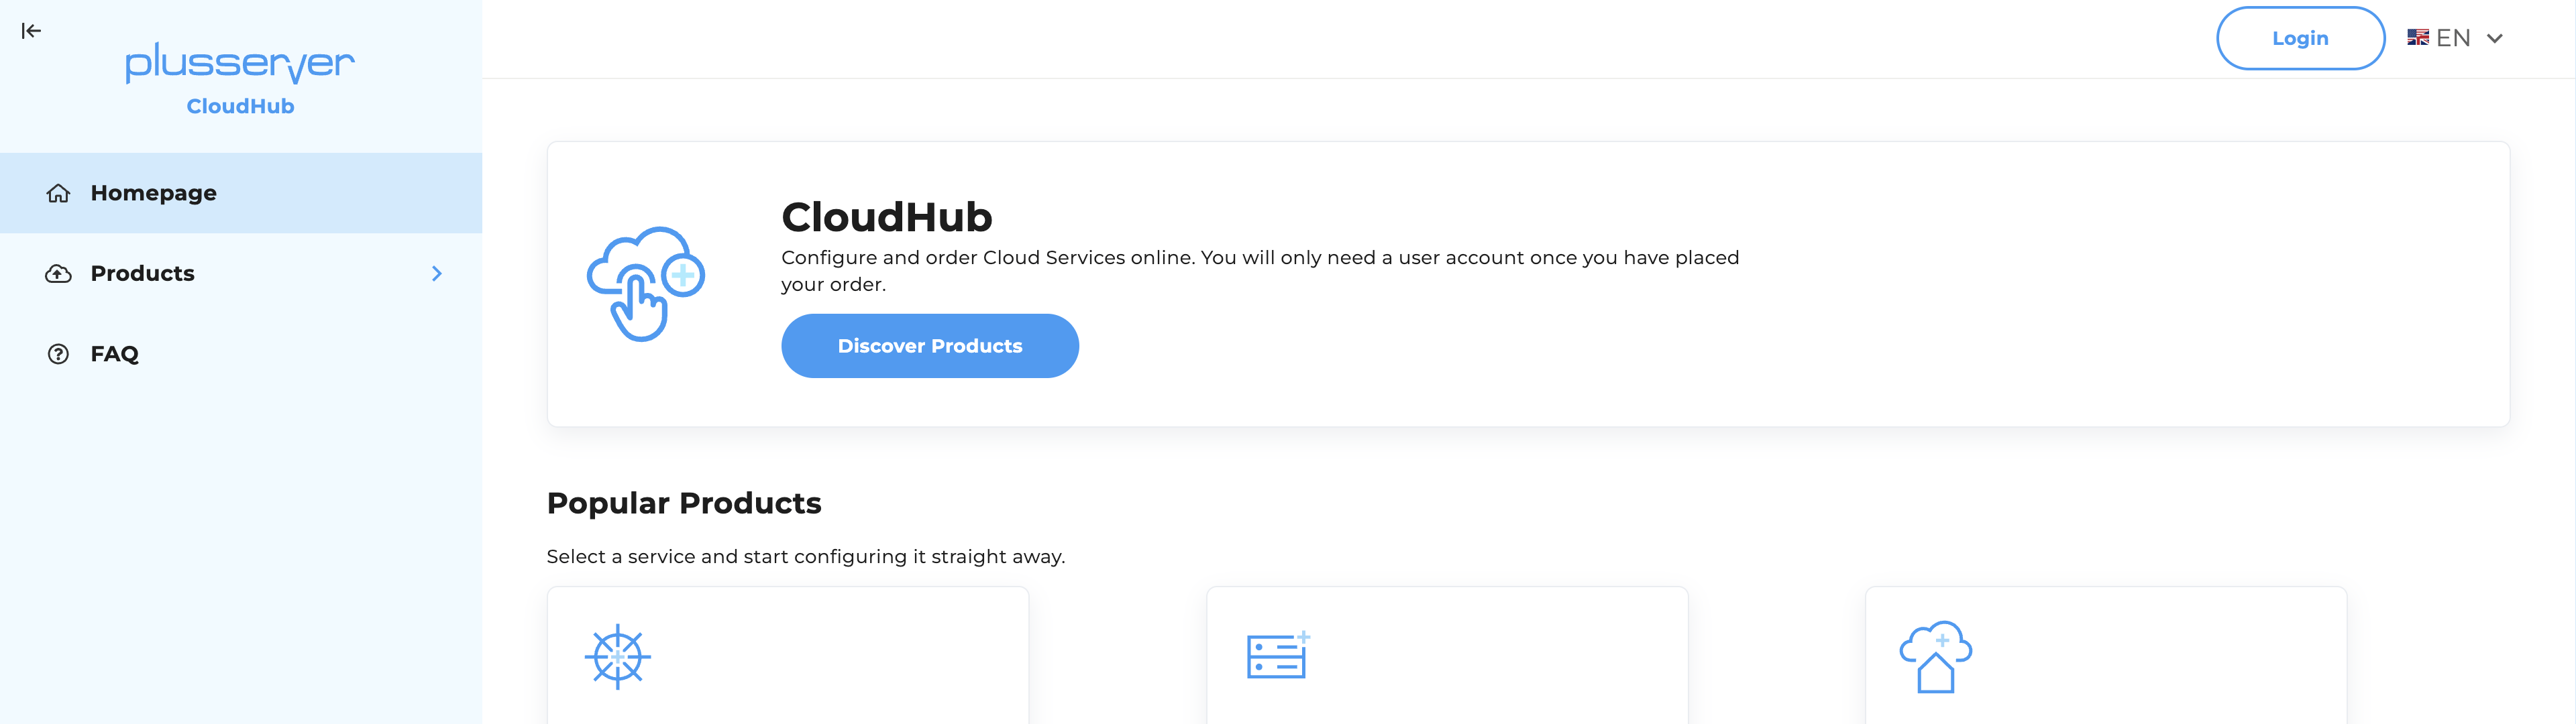
2. Start the registration
You will be redirected to the sign-in page. Click Register at the bottom to create a new account.
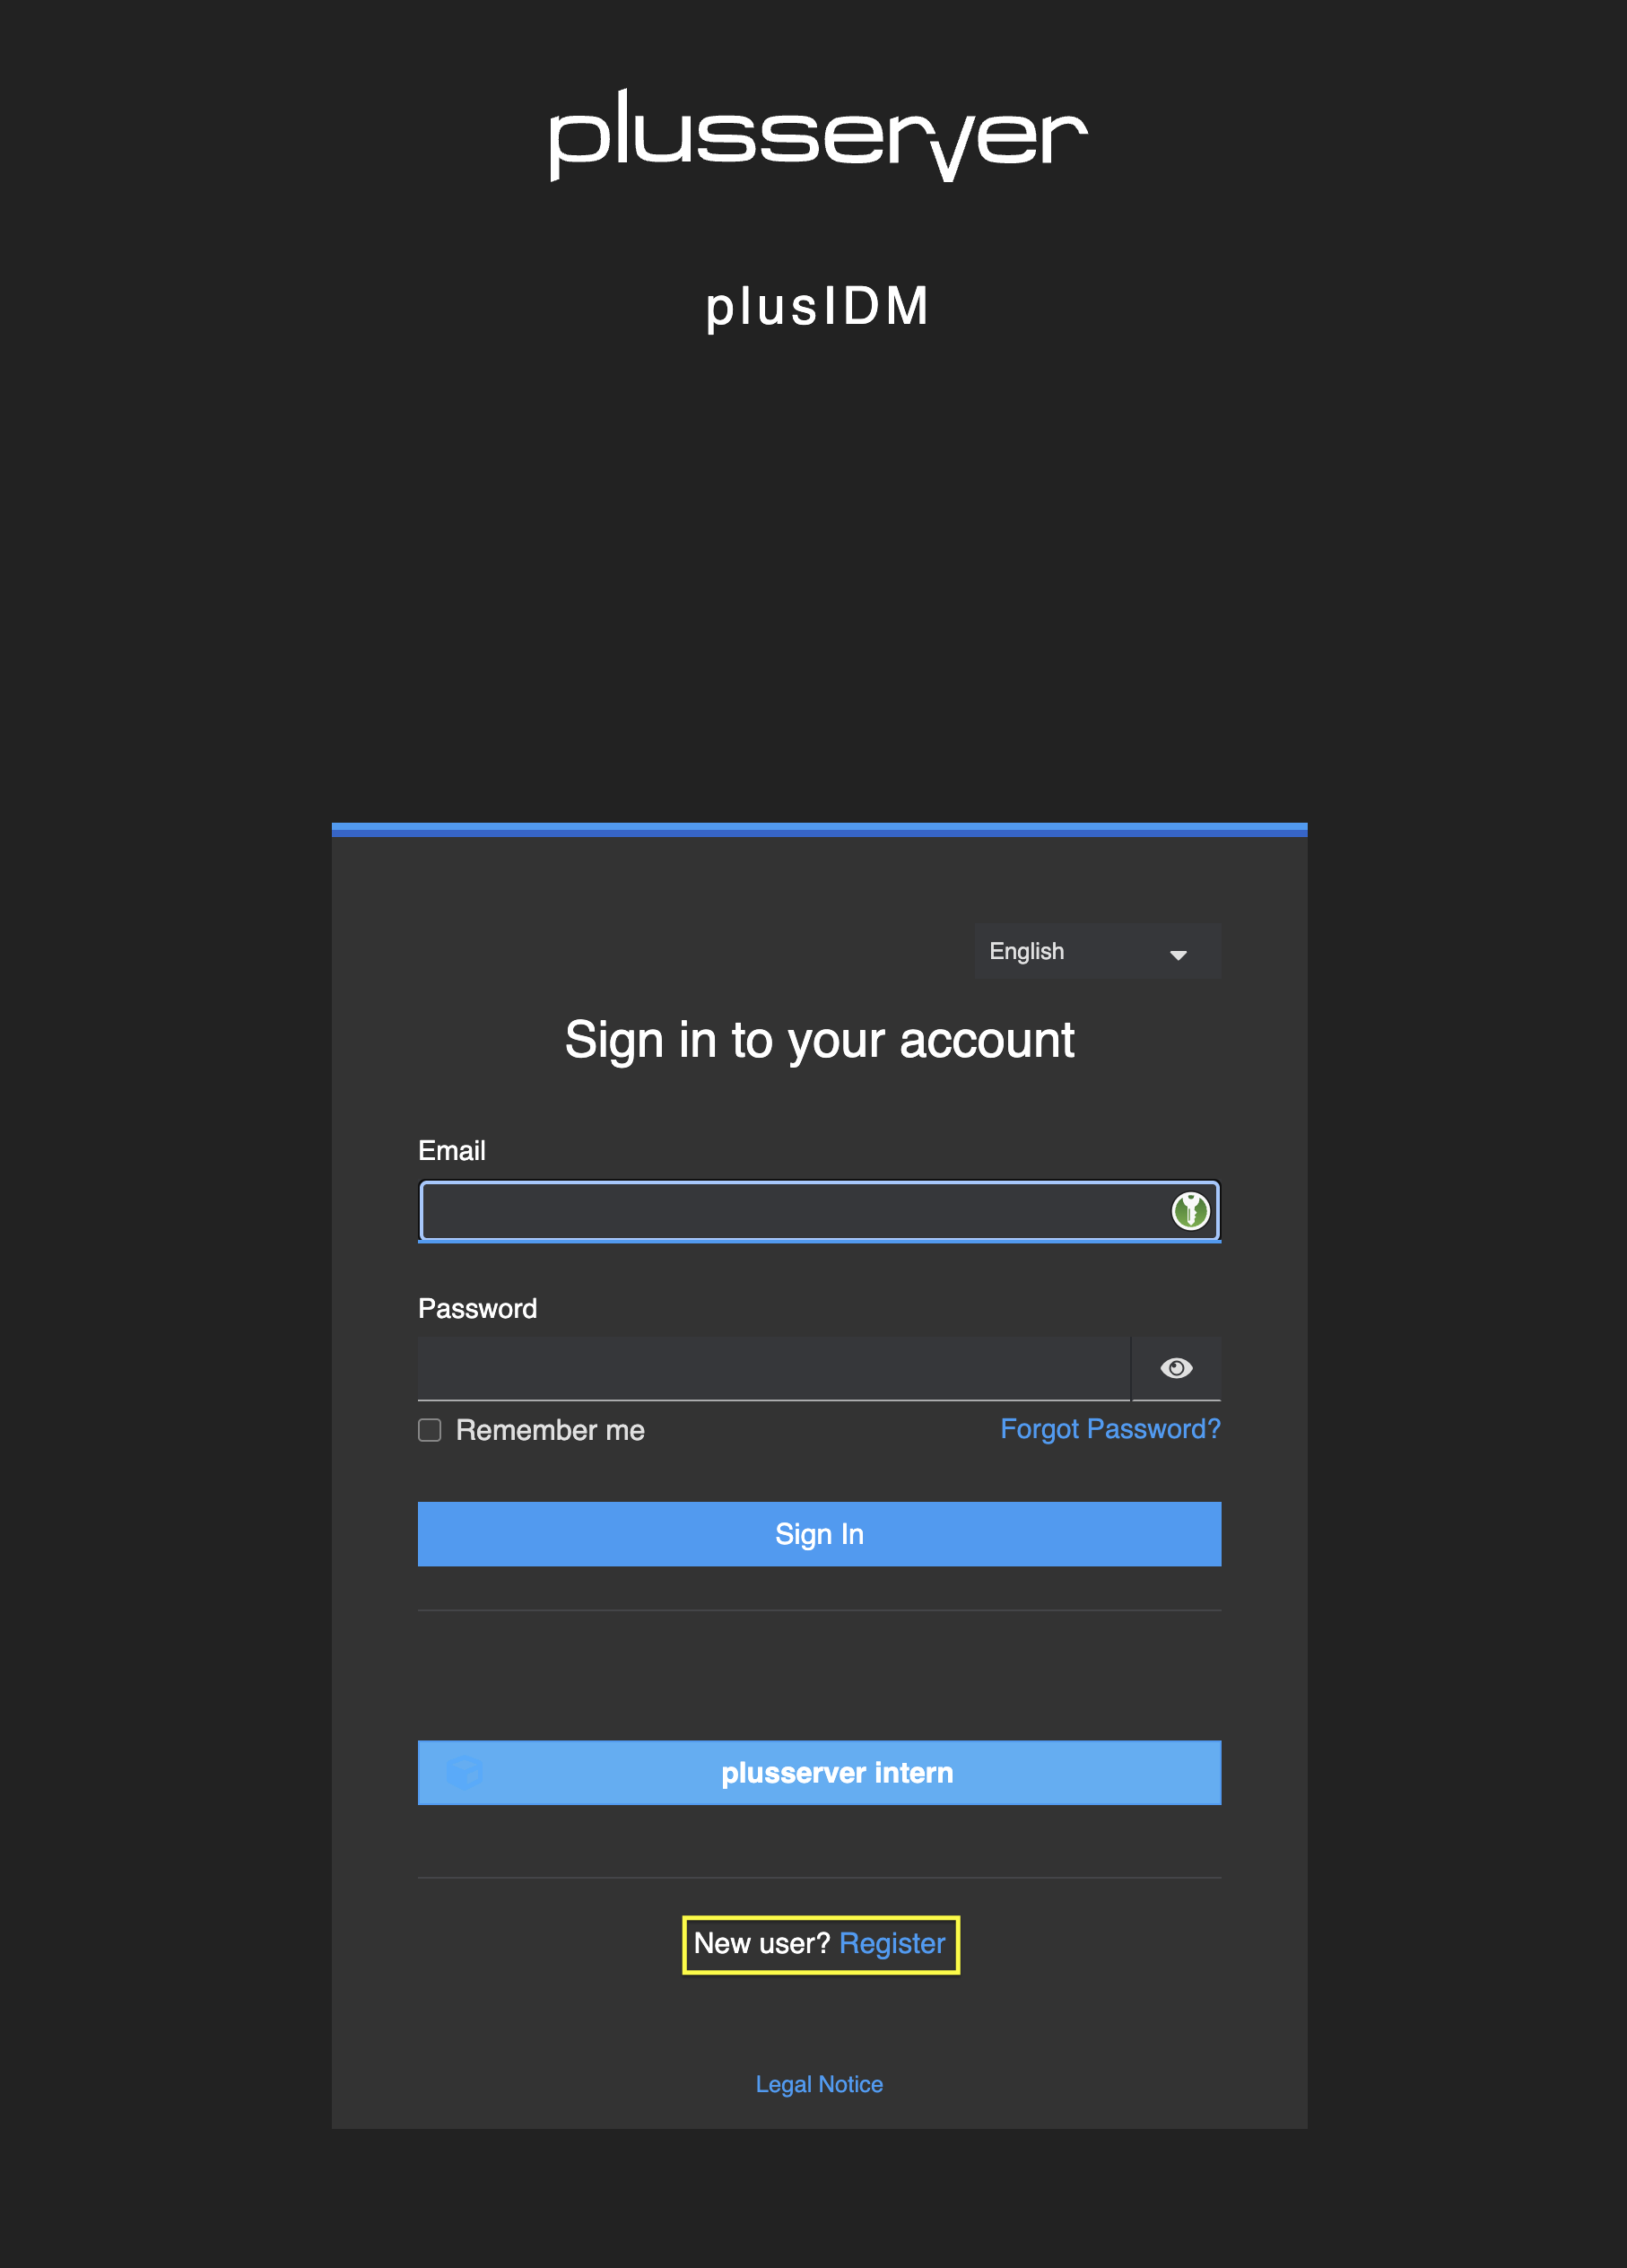
3. Fill out the registration form
Please fill out the form completely. All fields are required (marked with *).
Then click Register.
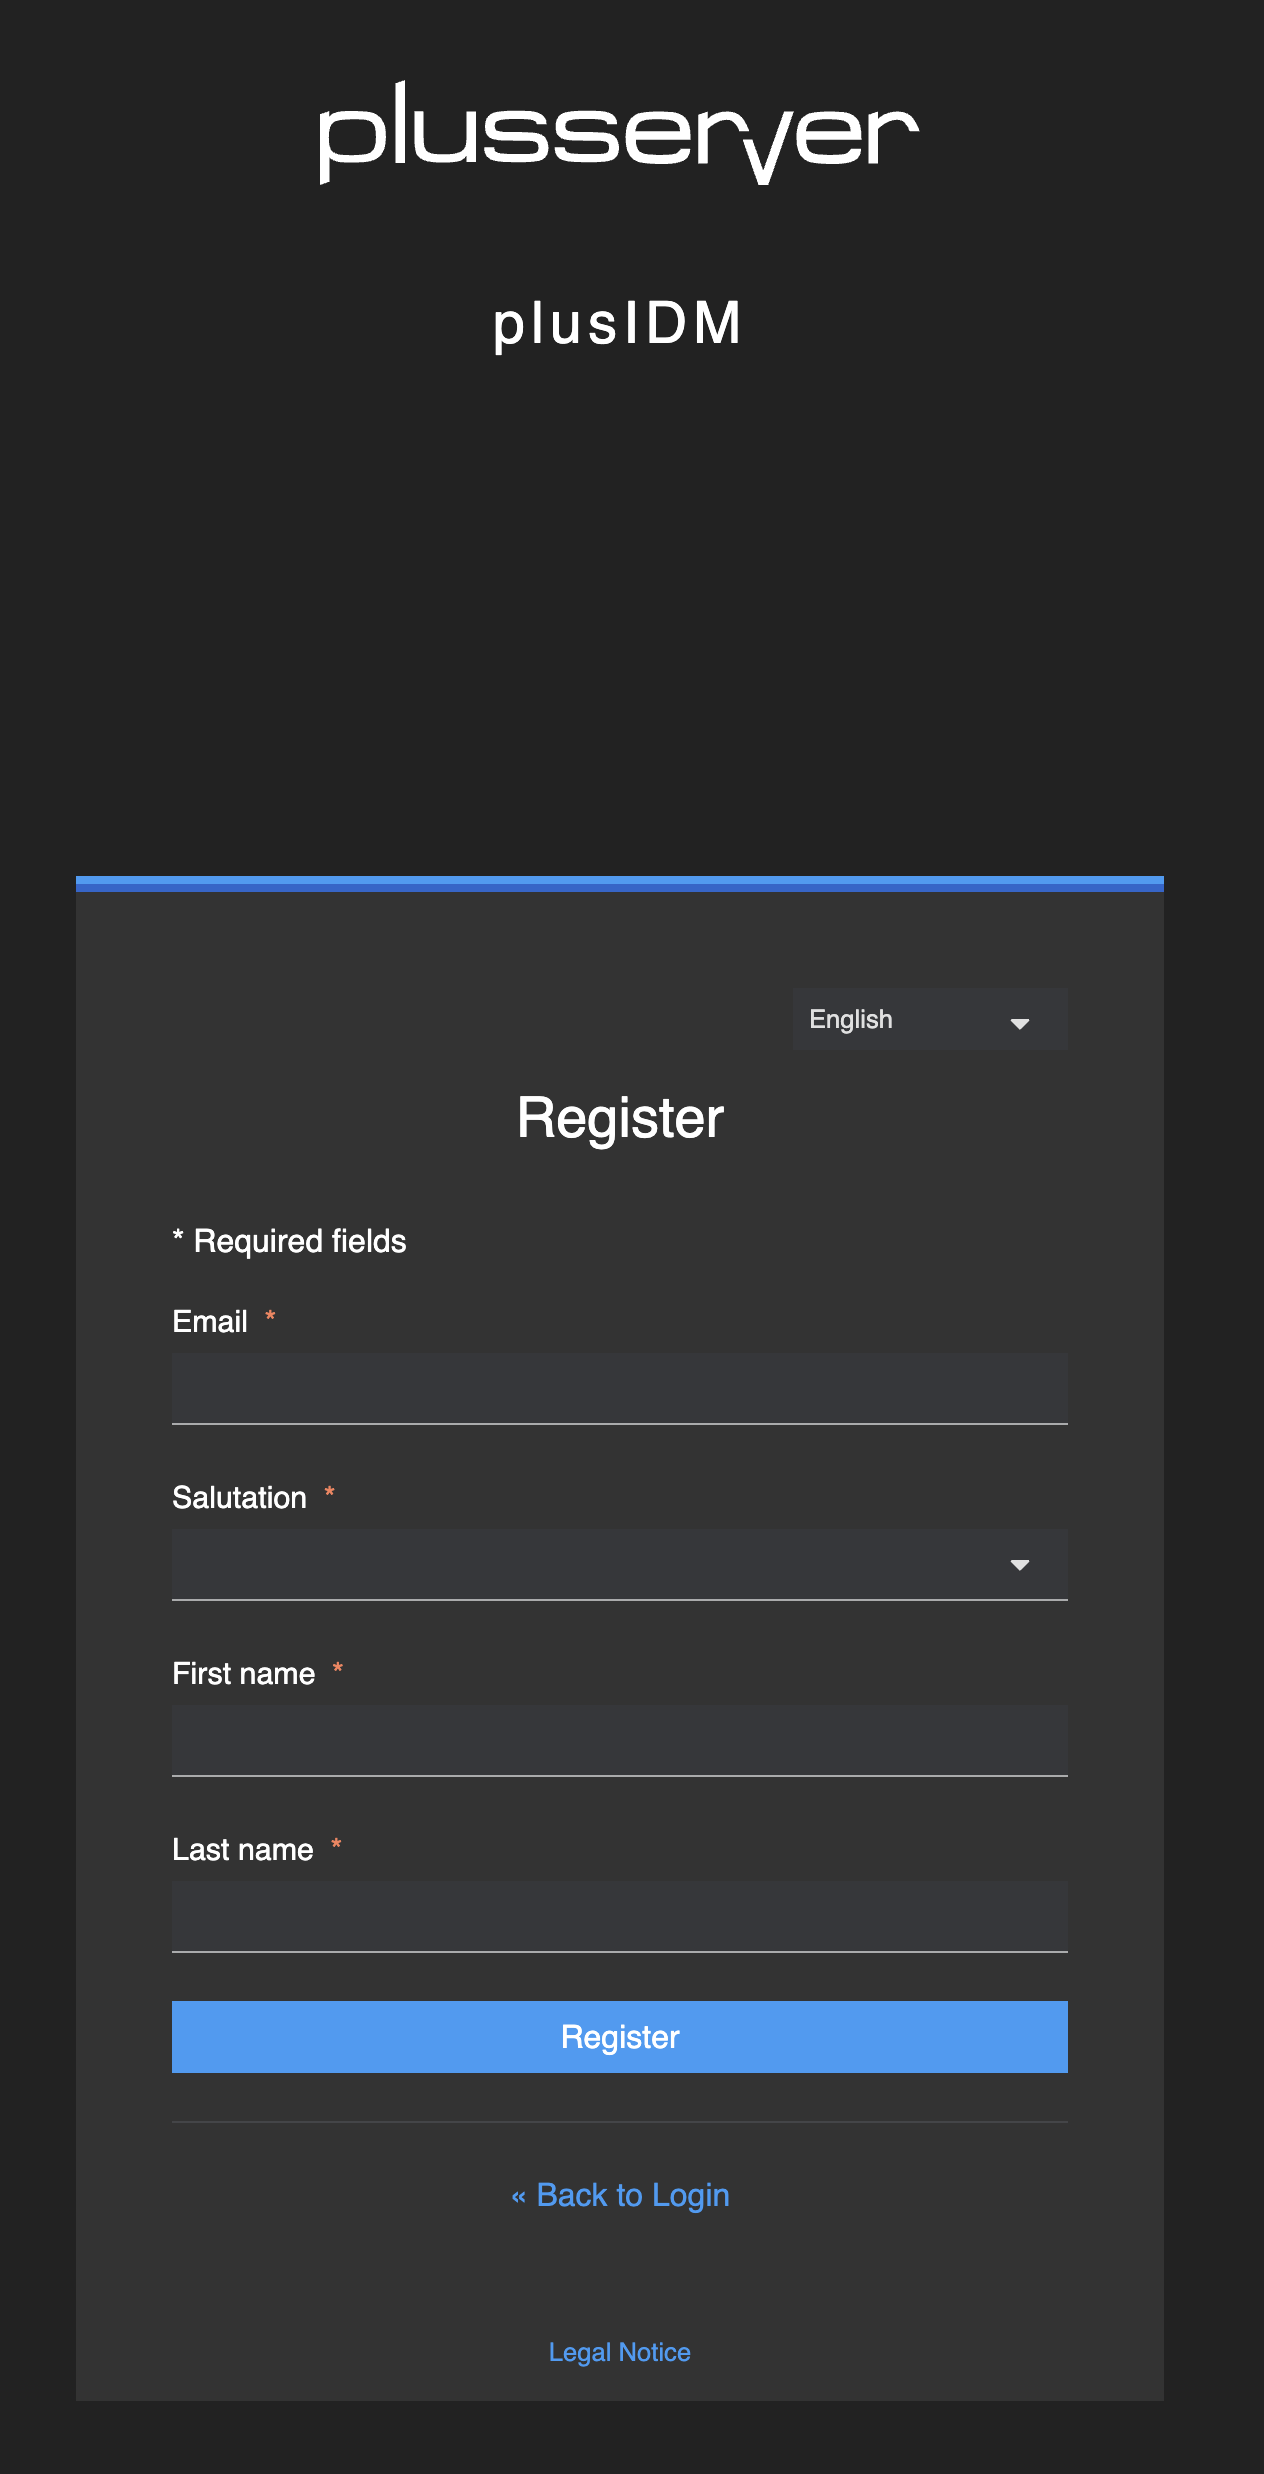
Note: Use « Back to sign in to return to the sign-in page if you already have an account.
4. Order a product
Since you have already registered, continue by placing your order. The ordering process is the same as described in Option 2; however, step 3 Registration is skipped, as you can simply sign in with your existing account.
Option 2: Registration during the ordering process
If you don’t have an account yet, CloudHub guides you through a five-step process while you order a product. Registration is step 3. The process is the same for all products:
- Configuration
- Order Summary
- Registration
- Company Details & Payment
- Order Status
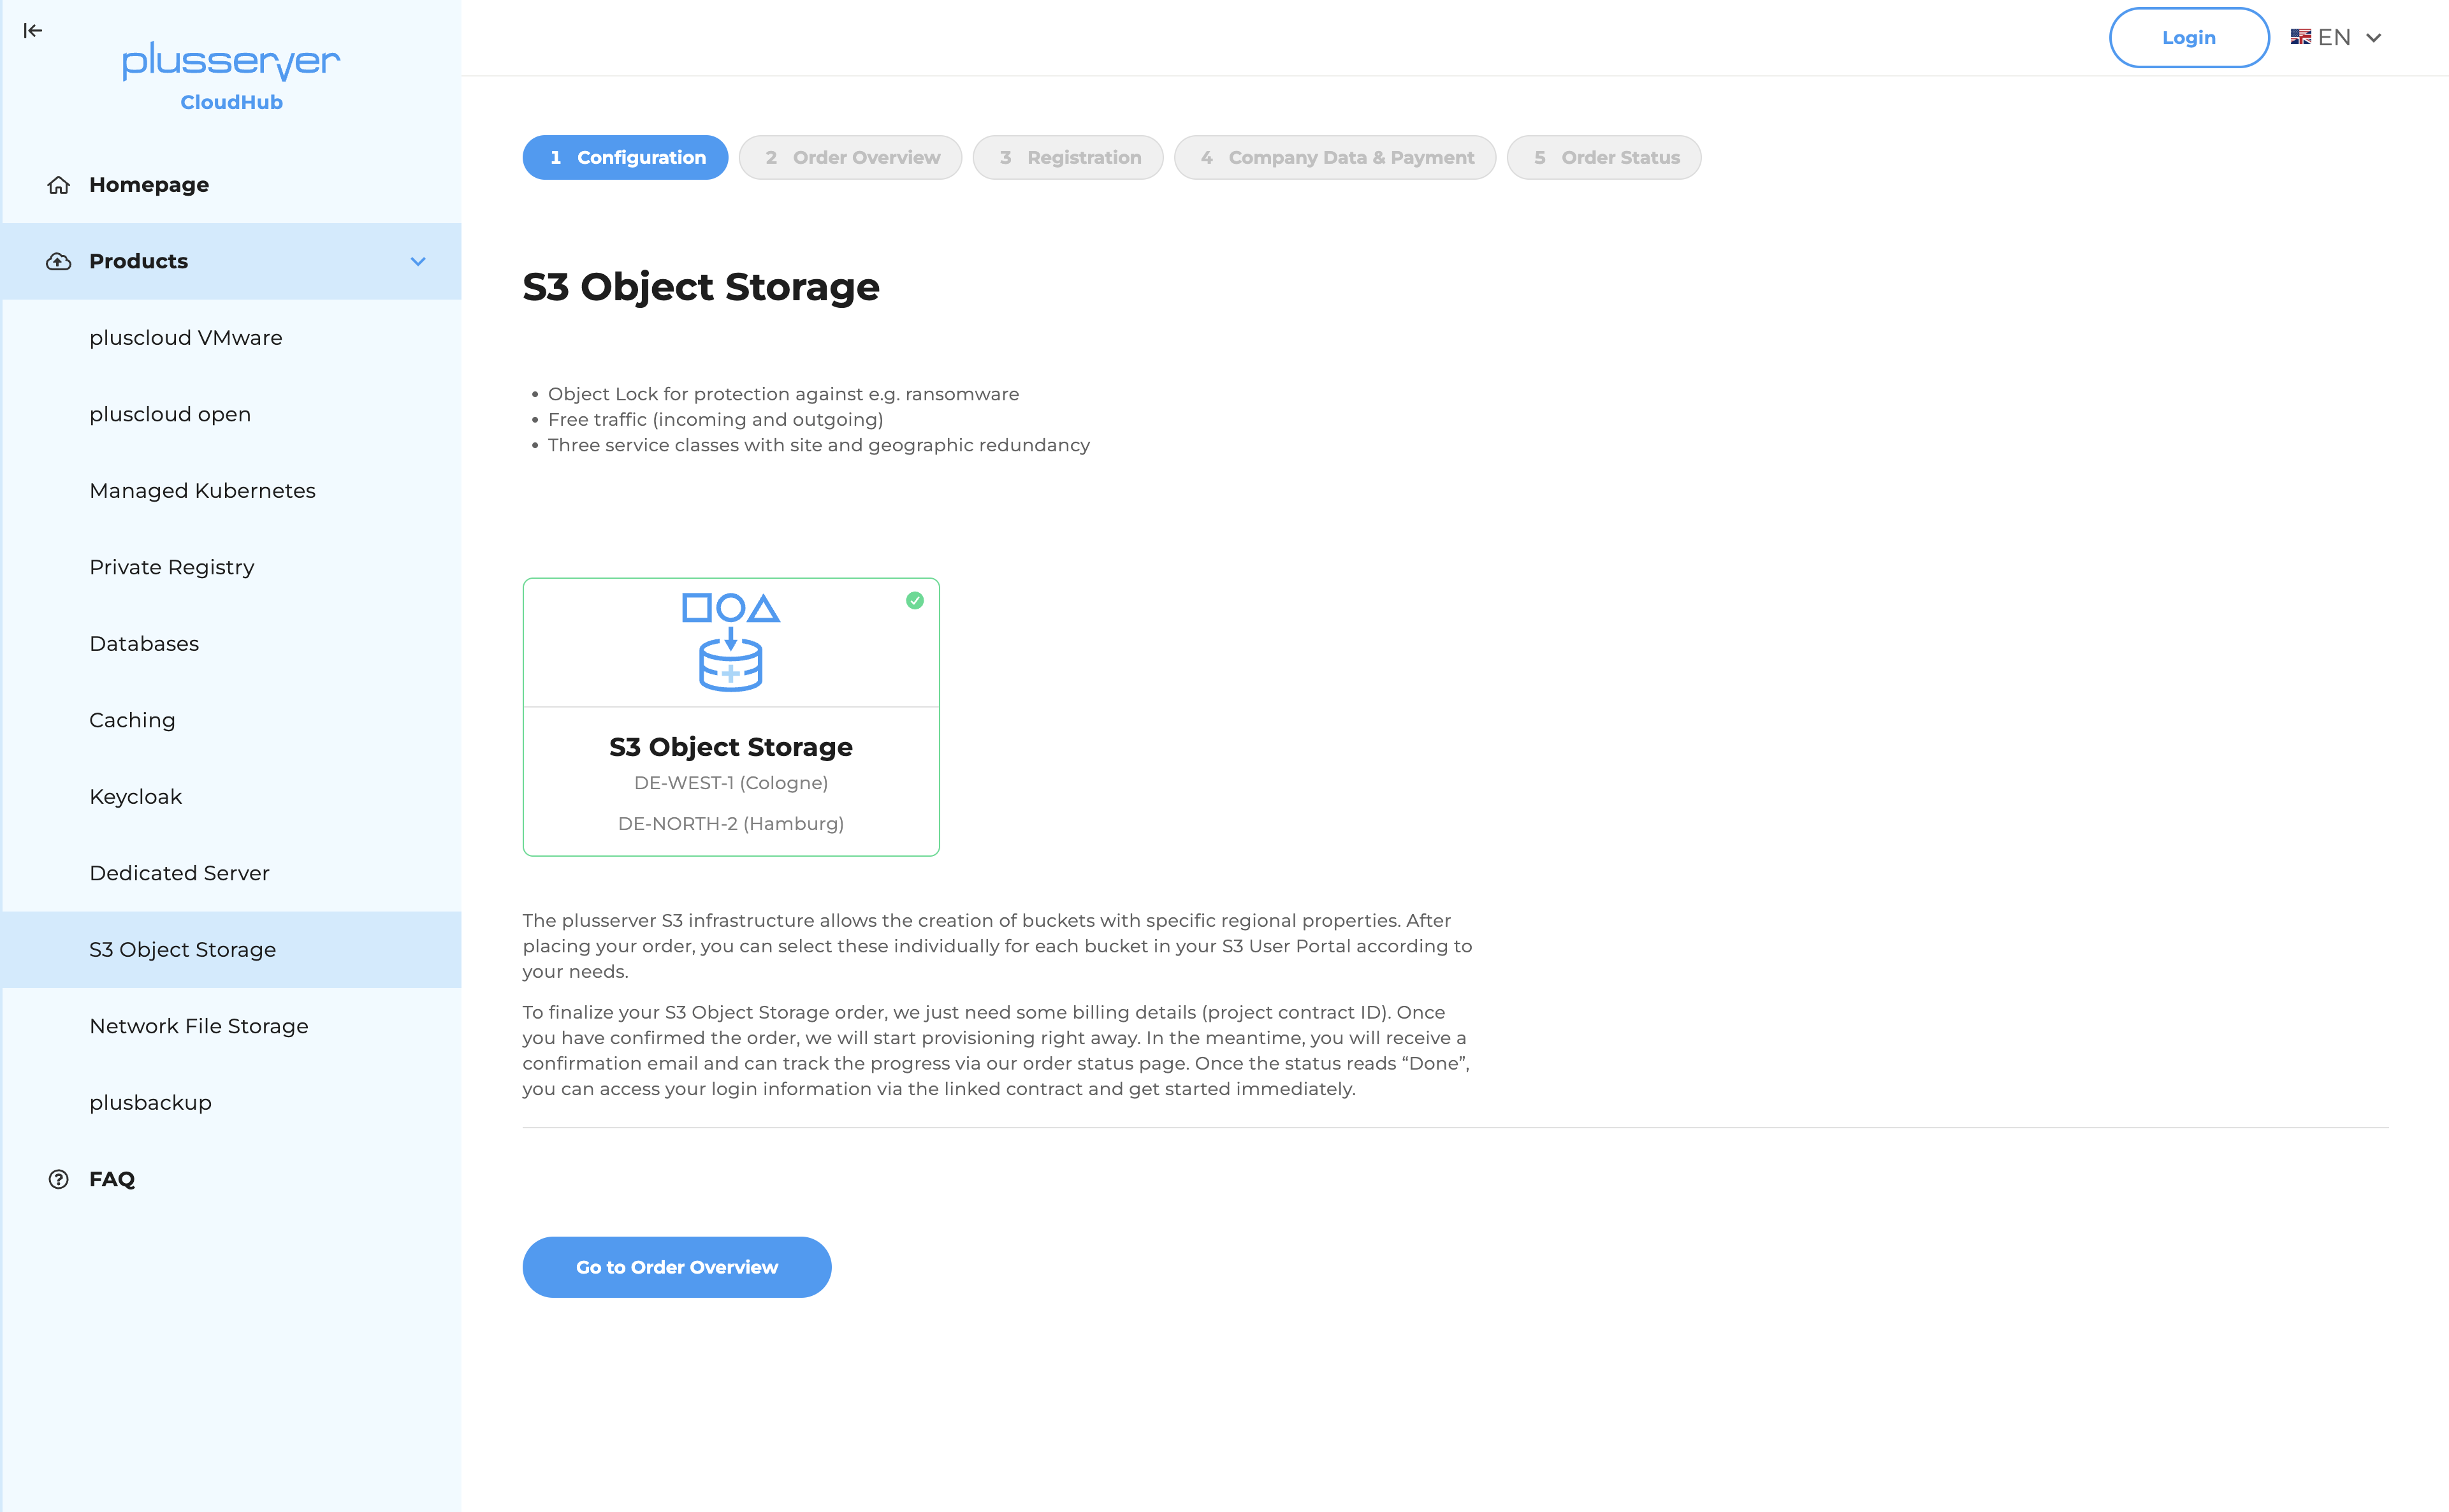
You can see the current step at any time in the progress indicator above the form. Completed steps are marked in green. The screenshots in this guide show the process using S3 Object Storage as an example.
1. Select and configure a product
- In the side navigation under Products, select the product you want.
- Review the product description and configuration. For S3 Object Storage, for example, these are the available locations DE-WEST-1 (Cologne) and DE-NORTH-2 (Hamburg).
- Click Continue to Order Summary.
2. Review the order summary
The order summary shows an overview of your configuration, e.g. version, project contract ID and pricing details. The price overview is displayed on the right.
Below that you will find the relevant contract documents, which depend on the product and configuration. Final approval takes place at checkout.
- Use Edit order to adjust your configuration.
- Click Continue to Registration to proceed.
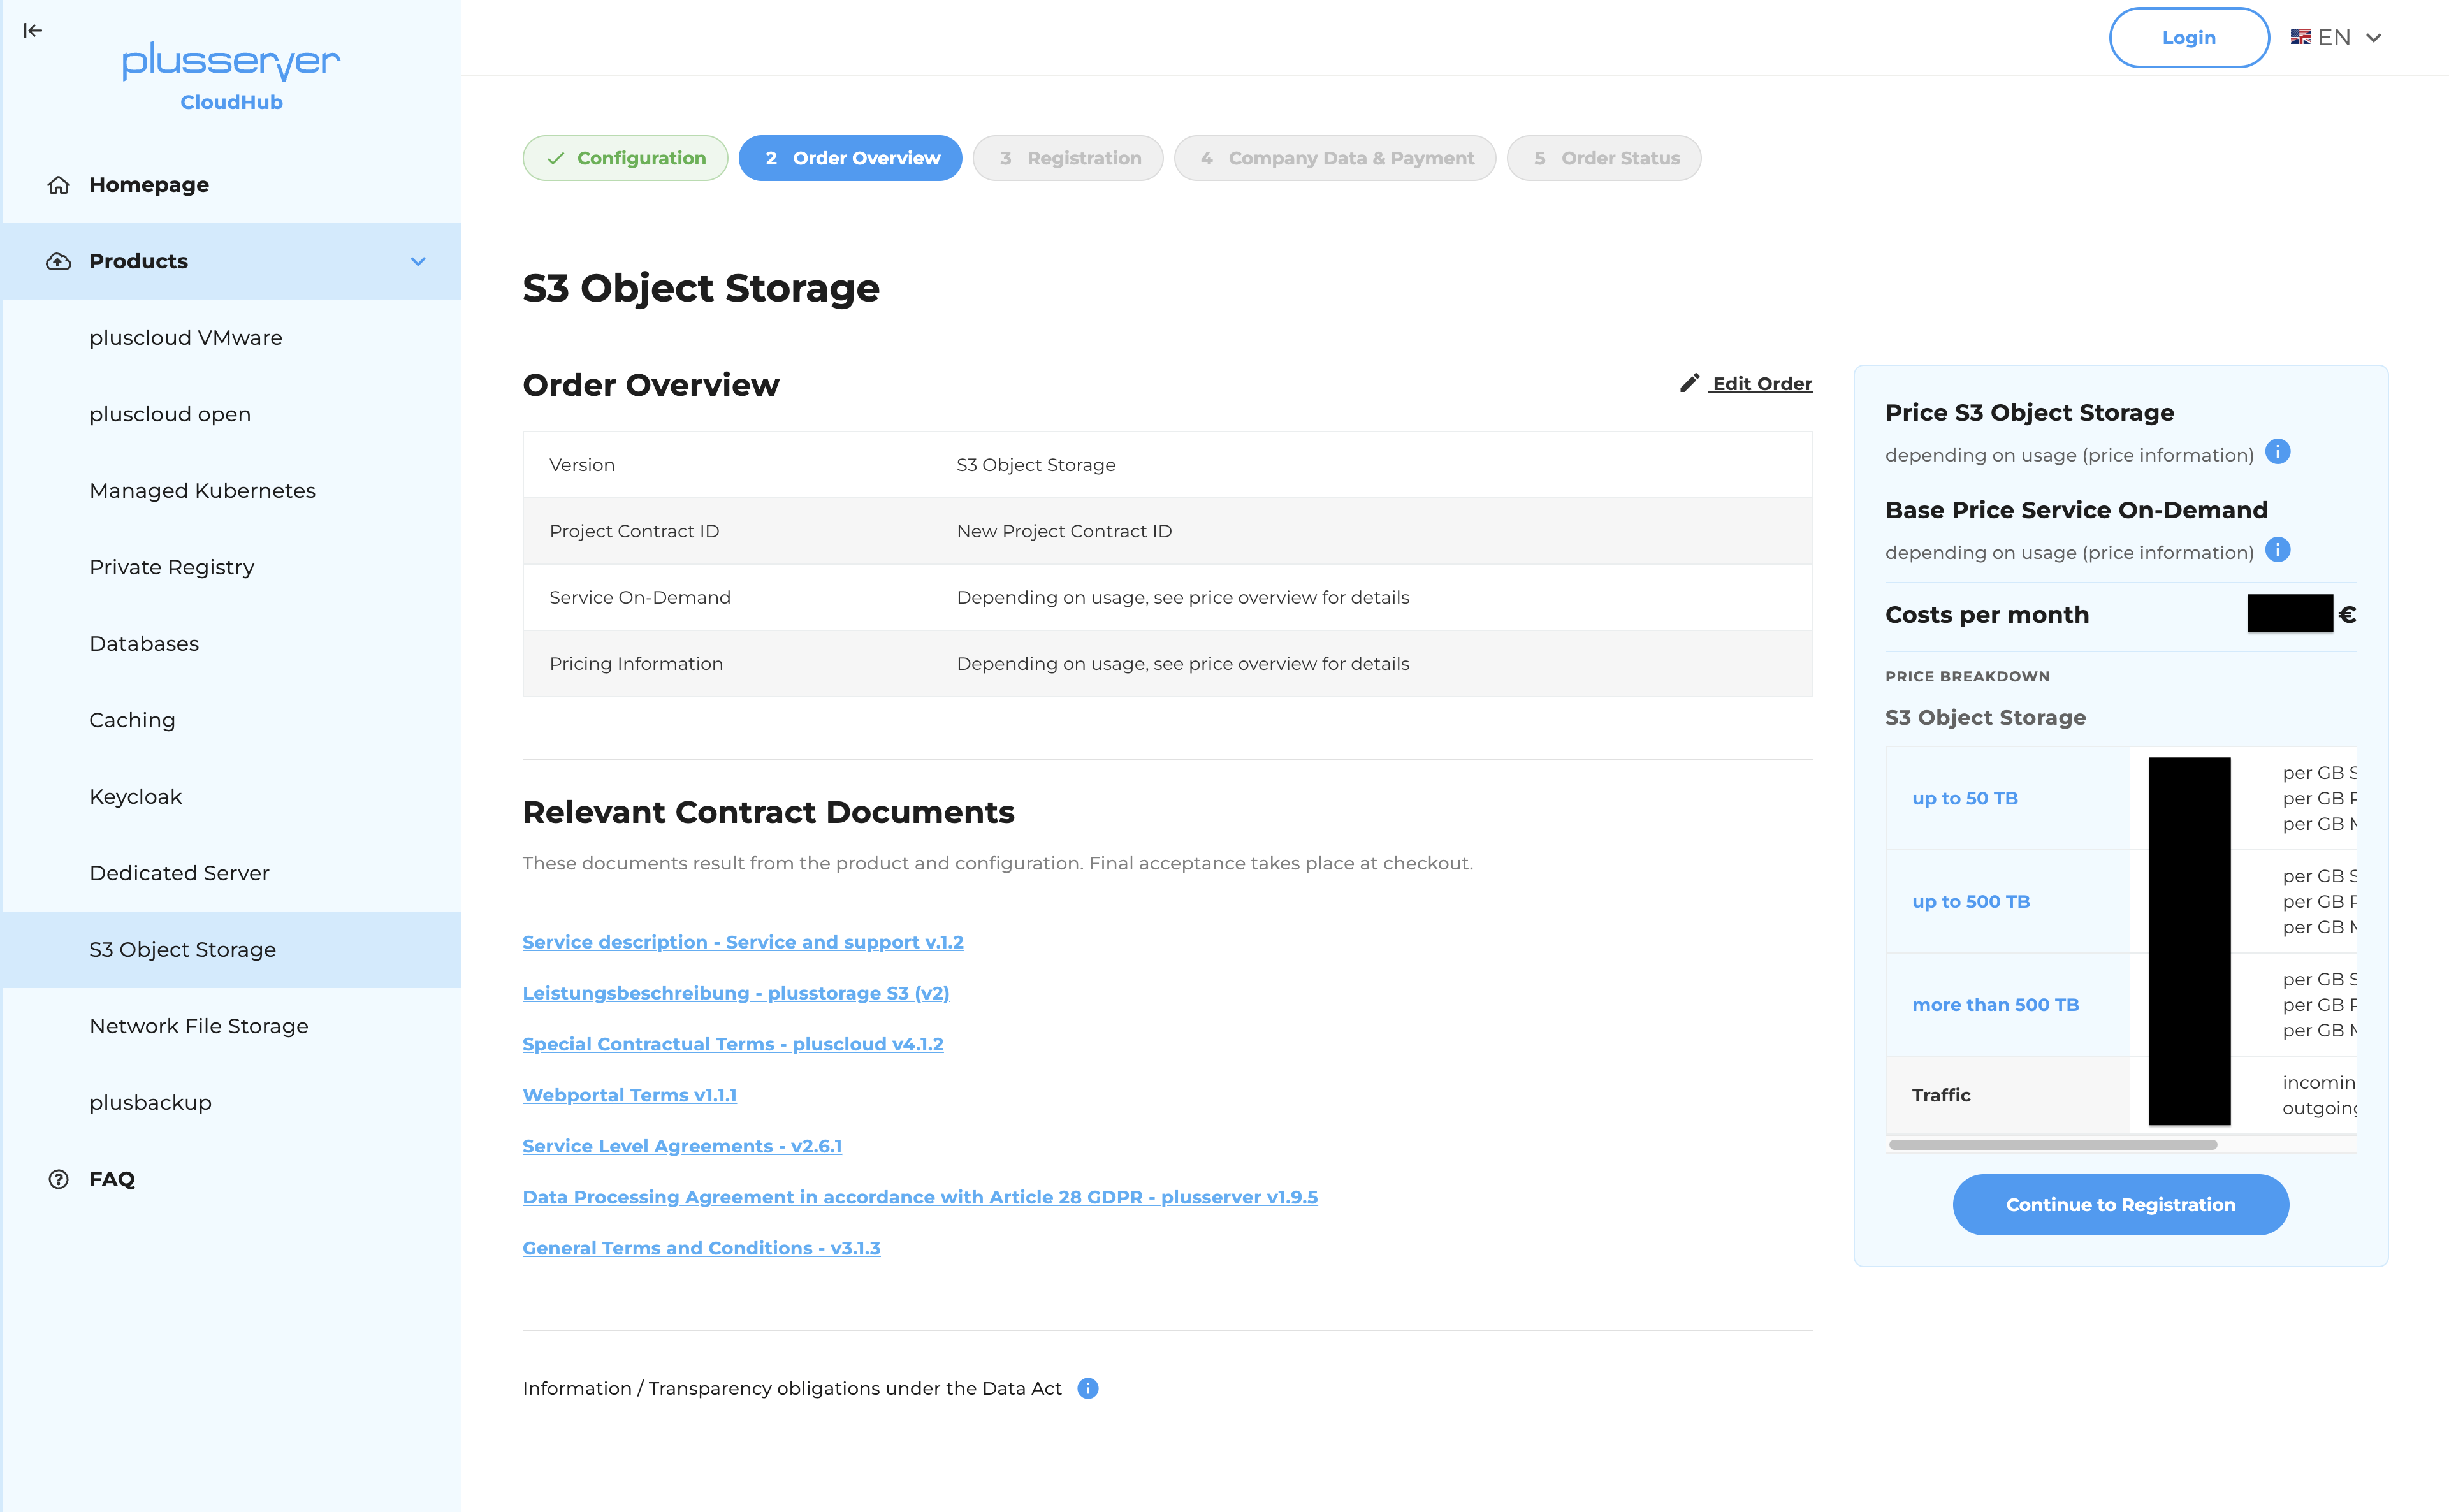
Note: For usage-based products such as S3 Object Storage, the monthly price is initially shown as €0. The actual costs depend on your usage. You can find details in the price overview.
3. Create an account
Now create your account. The following information is required:
- Salutation
- First name
- Last name
- Email address (for security reasons, you must enter it a second time in the Confirm email address field)
- Password (also with Confirm password)
The password must meet the following requirements:
- at least 12 characters
- at least one digit
- at least one special character
- uppercase and lowercase letters
A strength indicator below the field shows how secure your password is. Use the eye icon to show or hide your input.
Then click Register.
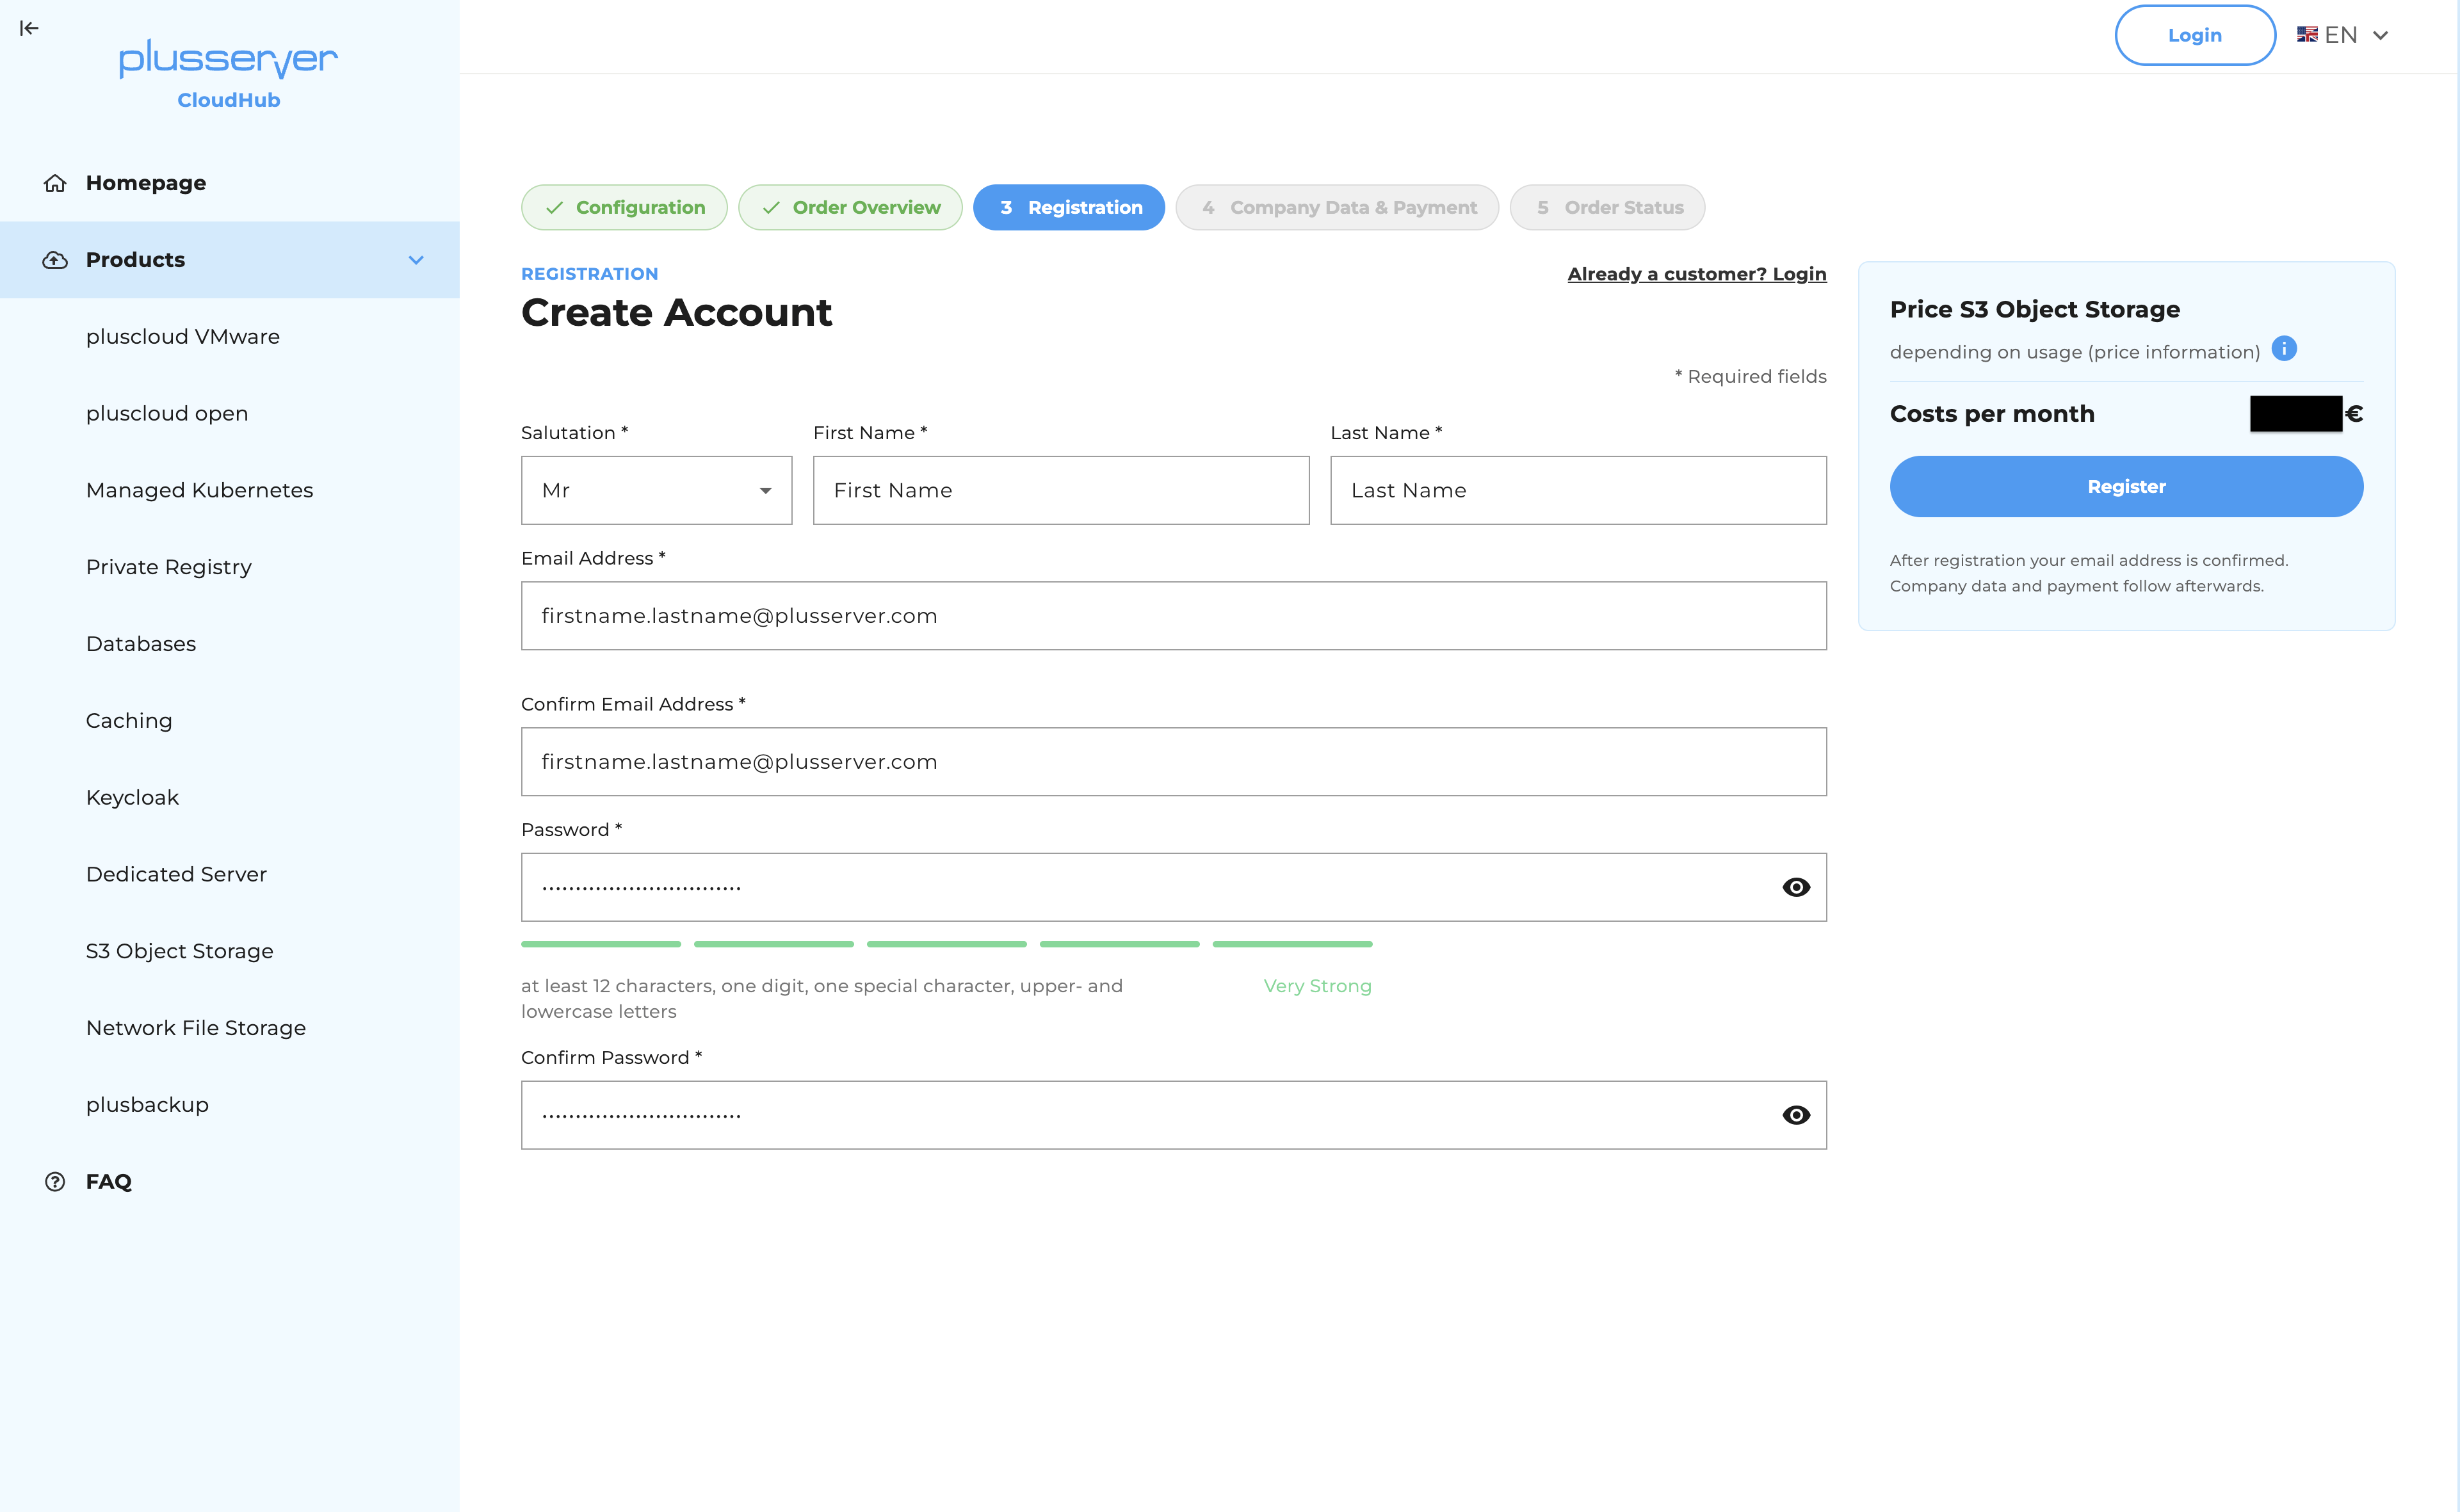
Note: Already have an account? Click Already a customer? Sign in in the top right corner of the form – step 3 is then skipped, and you continue directly with step 4.
4. Confirm your email address
After registration, we will send you an email containing a confirmation link. For security reasons, you must confirm your email address before you can continue with company details and payment.
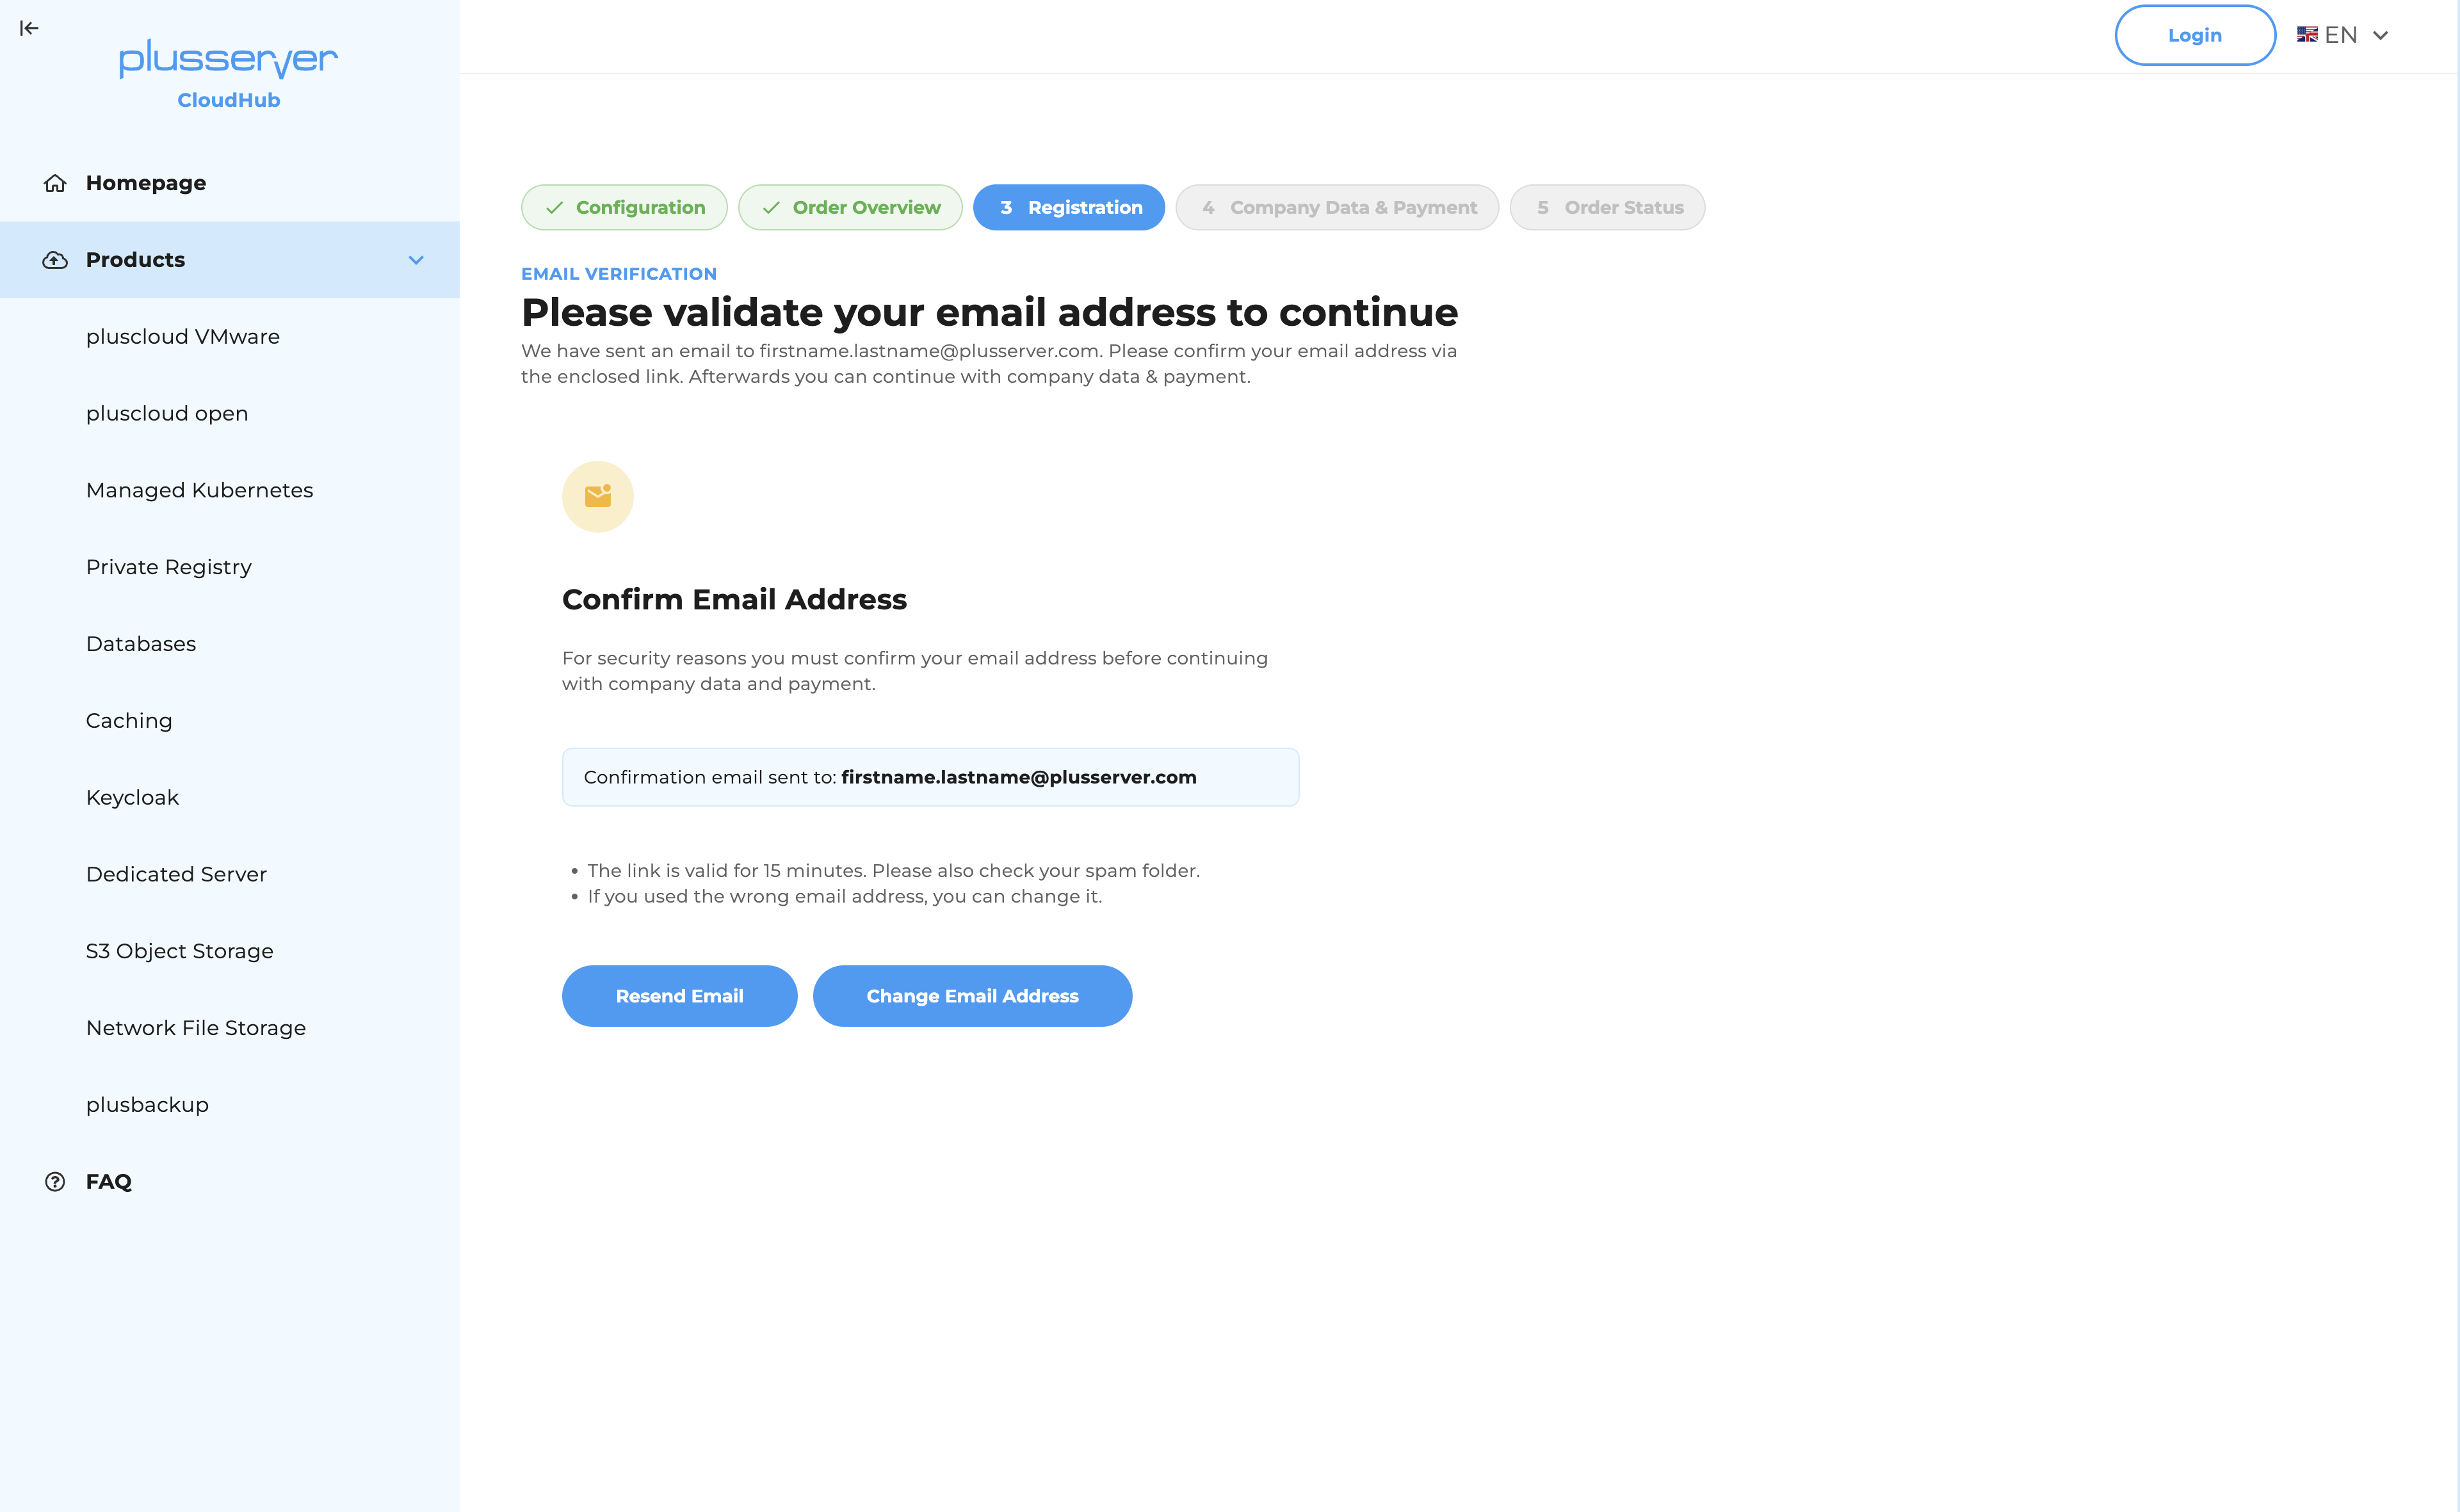
- The link is valid for 24 hours.
- Please also check your spam folder.
- Use Resend email to request the confirmation email again.
- If you used the wrong email address, you can correct it via Change email address.
After you click the link in the email, you will be redirected back to CloudHub, where you need to sign in with your email address and password.
5. Enter company details
In the next step, you enter your company details and billing address. Fields marked with * are required.
| Field | Required |
|---|---|
| Company name | ✔ |
| Salutation | ✔ |
| First name | ✔ |
| Last name | ✔ |
| Street | ✔ |
| No. | ✔ |
| Postal code | ✔ |
| City | ✔ |
| Country | ✔ |
| VAT ID | – |
| Phone number | ✔ |
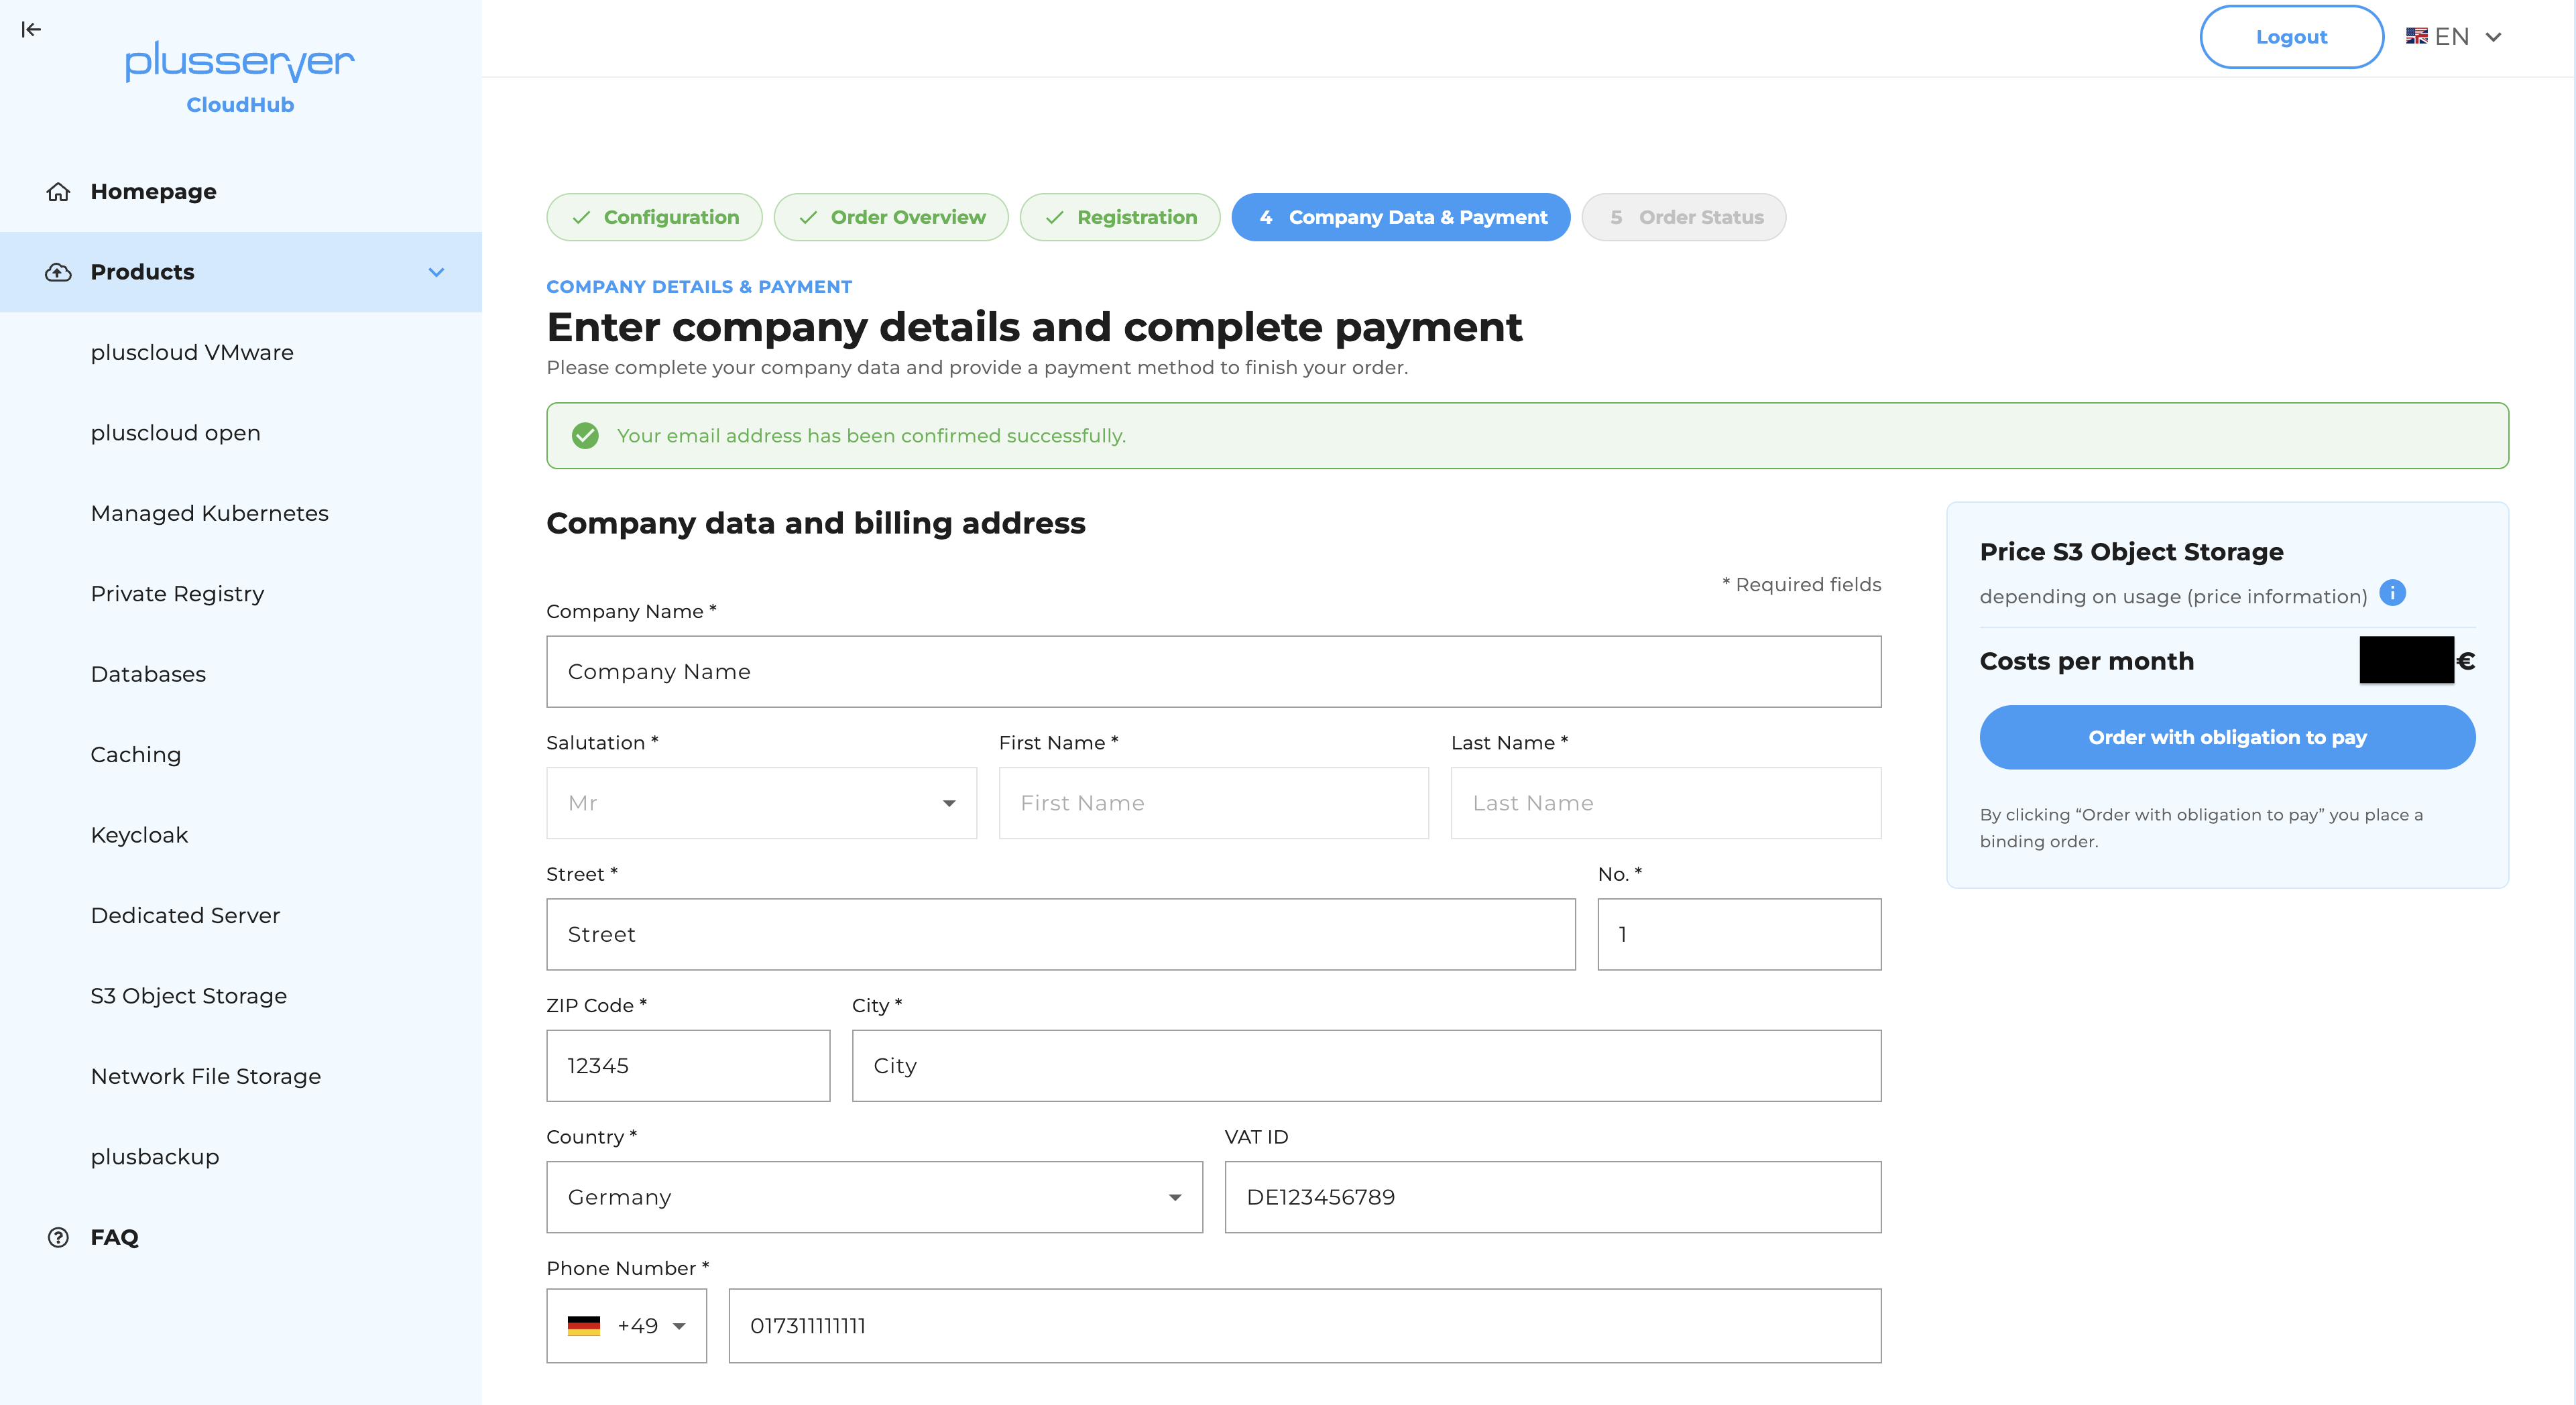
You enter your payment method in the lower part of the page.
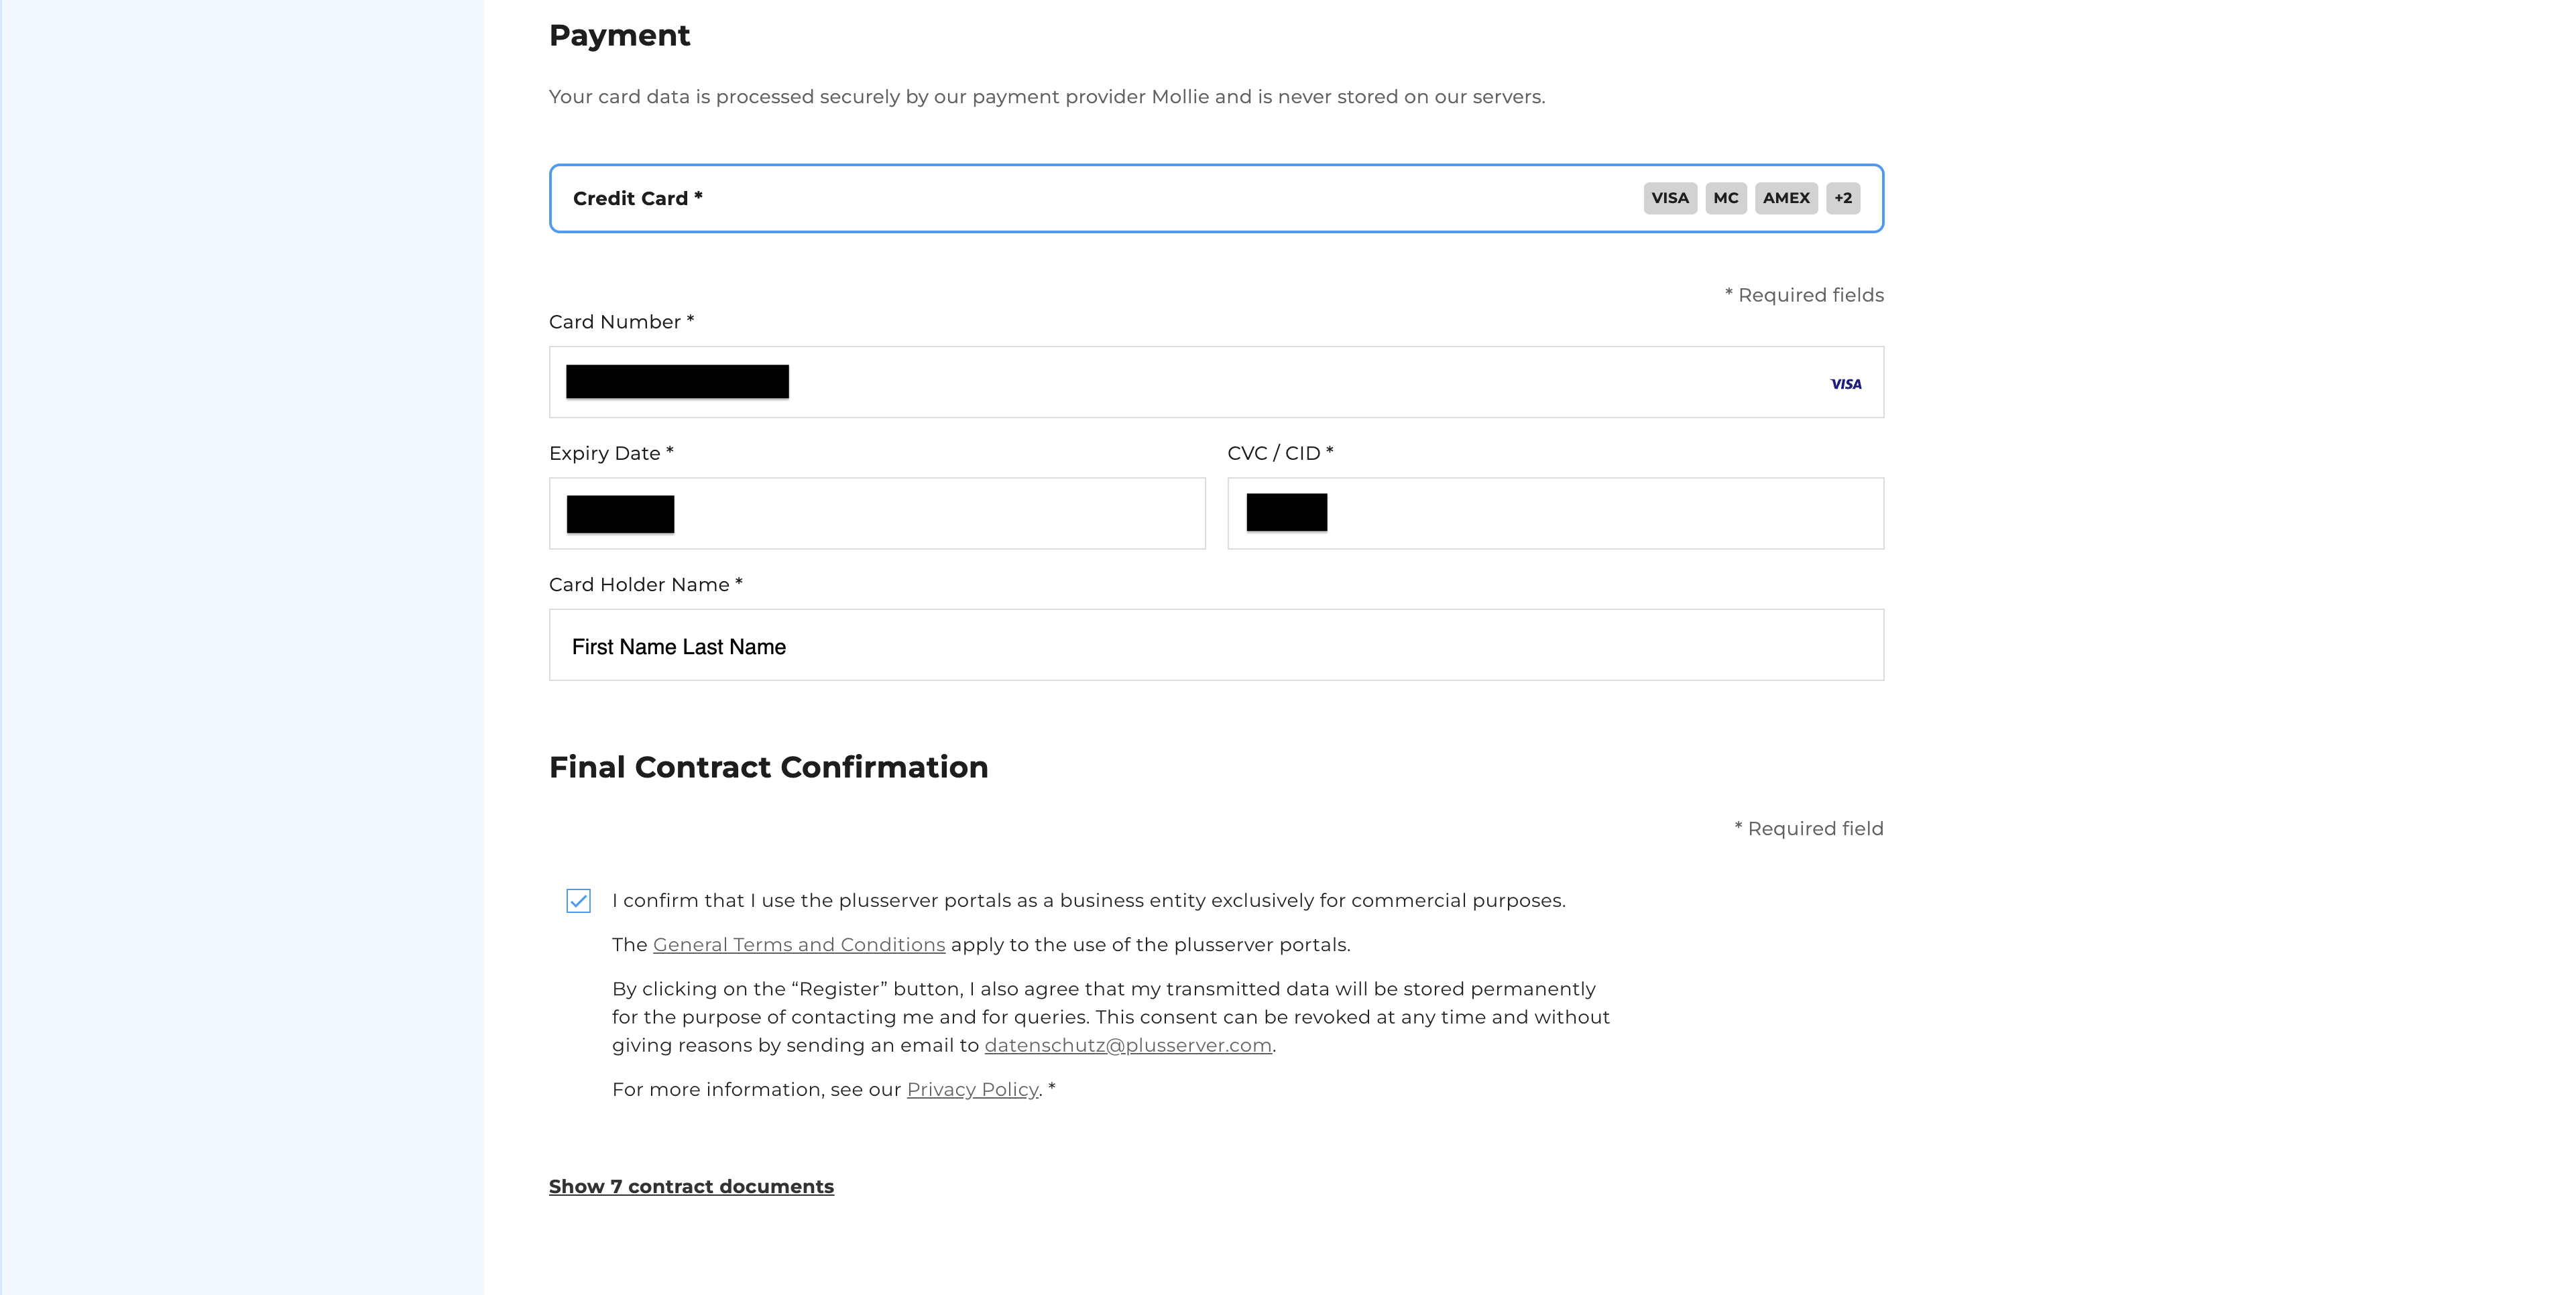
Payment
Currently, you can pay by credit card (including Visa, Mastercard and American Express). Please provide the following:
- Card number
- Expiry date
- CVC / CID
- Cardholder name
Your card details are processed securely by our payment service provider Mollie and are not stored on plusserver’s servers.
Final contract confirmation
Finally, use the checkbox to confirm that you use the plusserver portals as a business operator exclusively for commercial purposes. By doing so, you also agree to the General Terms and Conditions and consent to the storage of your data for contact purposes and follow-up inquiries. You can find further information in the Privacy Policy.
Use Show contract documents to review all contracts relevant to your order once more.
6. Complete your order
Click Order with obligation to pay in the price overview on the right.
Important: By clicking Order with obligation to pay, you place a binding order.
7. Order status
After submitting, you will see the confirmation page. Your account has been set up successfully and your order has been submitted.
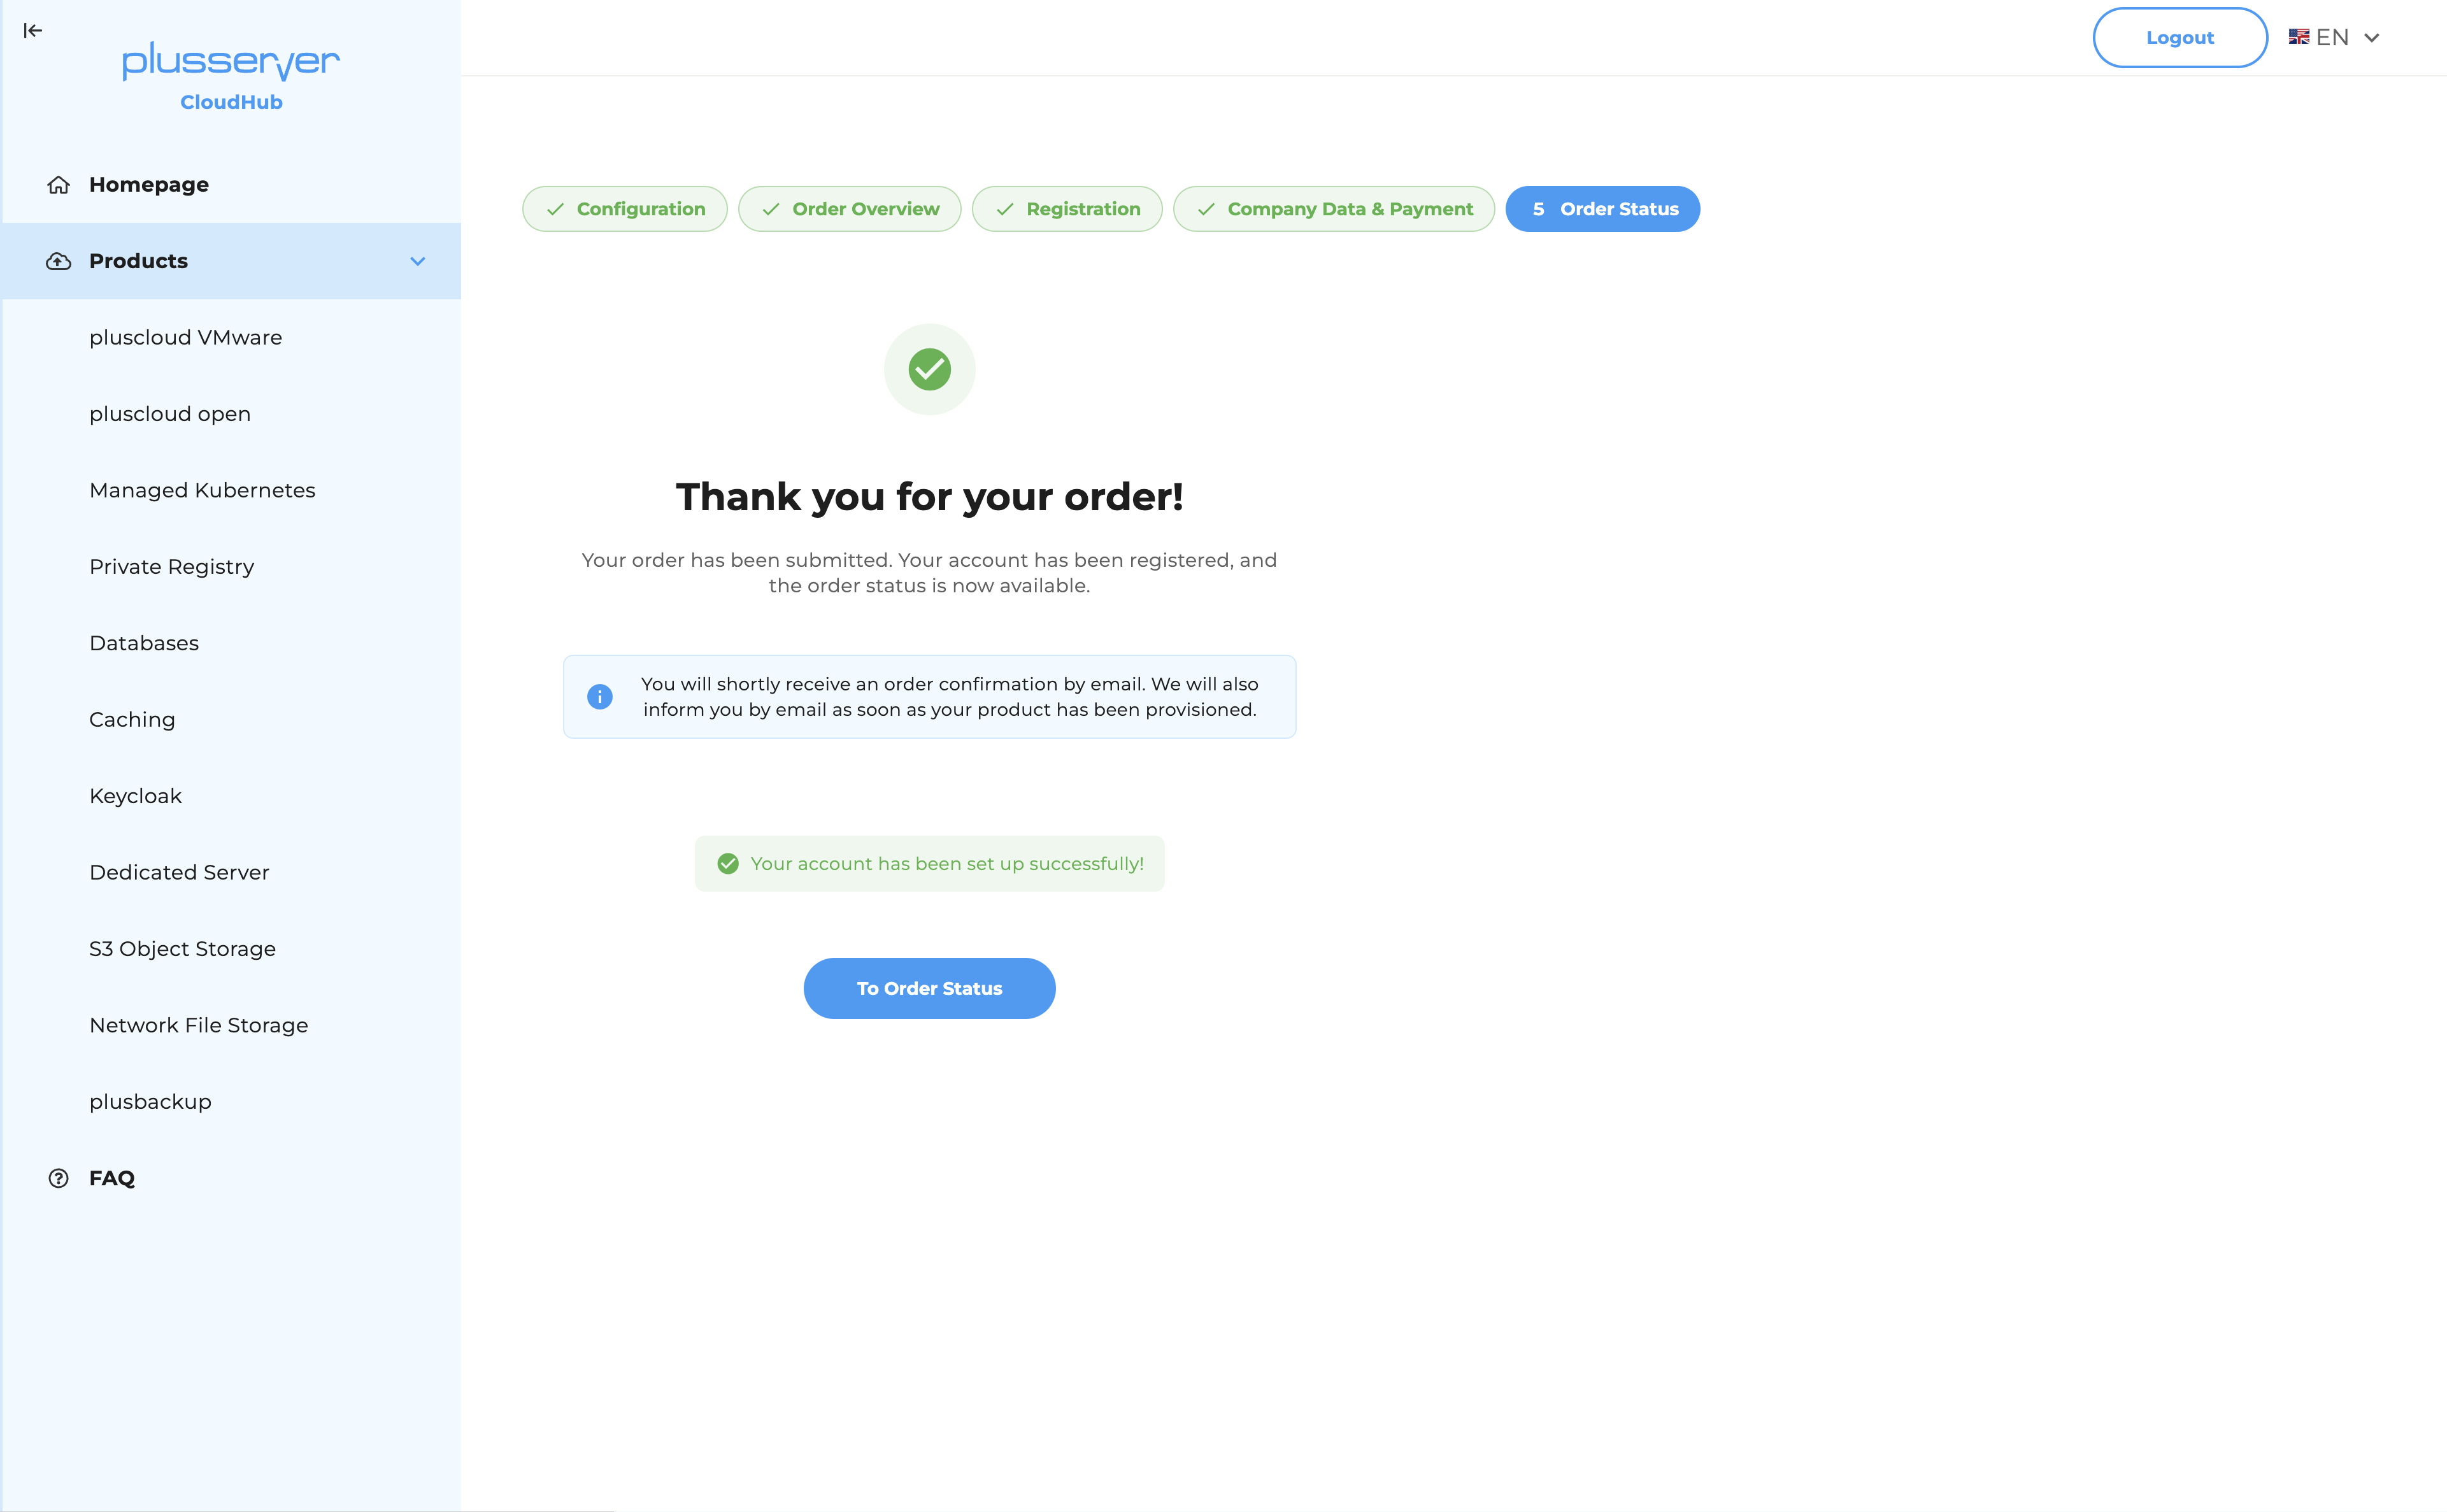
- You will shortly receive an order confirmation by email.
- Click Go to Order Status to track the progress of your provisioning.
Note: If you do not receive the emails, please first check your spam or junk folder. If the message cannot be found there either, please contact our Support.