DNS Administration
4 minute read
The “DNS Management” page provides you with a central interface for managing your DNS settings. It is divided into three tabs: Nameserver, Reverse DNS and Redirects. These areas allow you to independently configure your DNS zones and PTR entries.
Nameservers
In the “Nameserver” tab, you can manage the DNS zones of your domains.
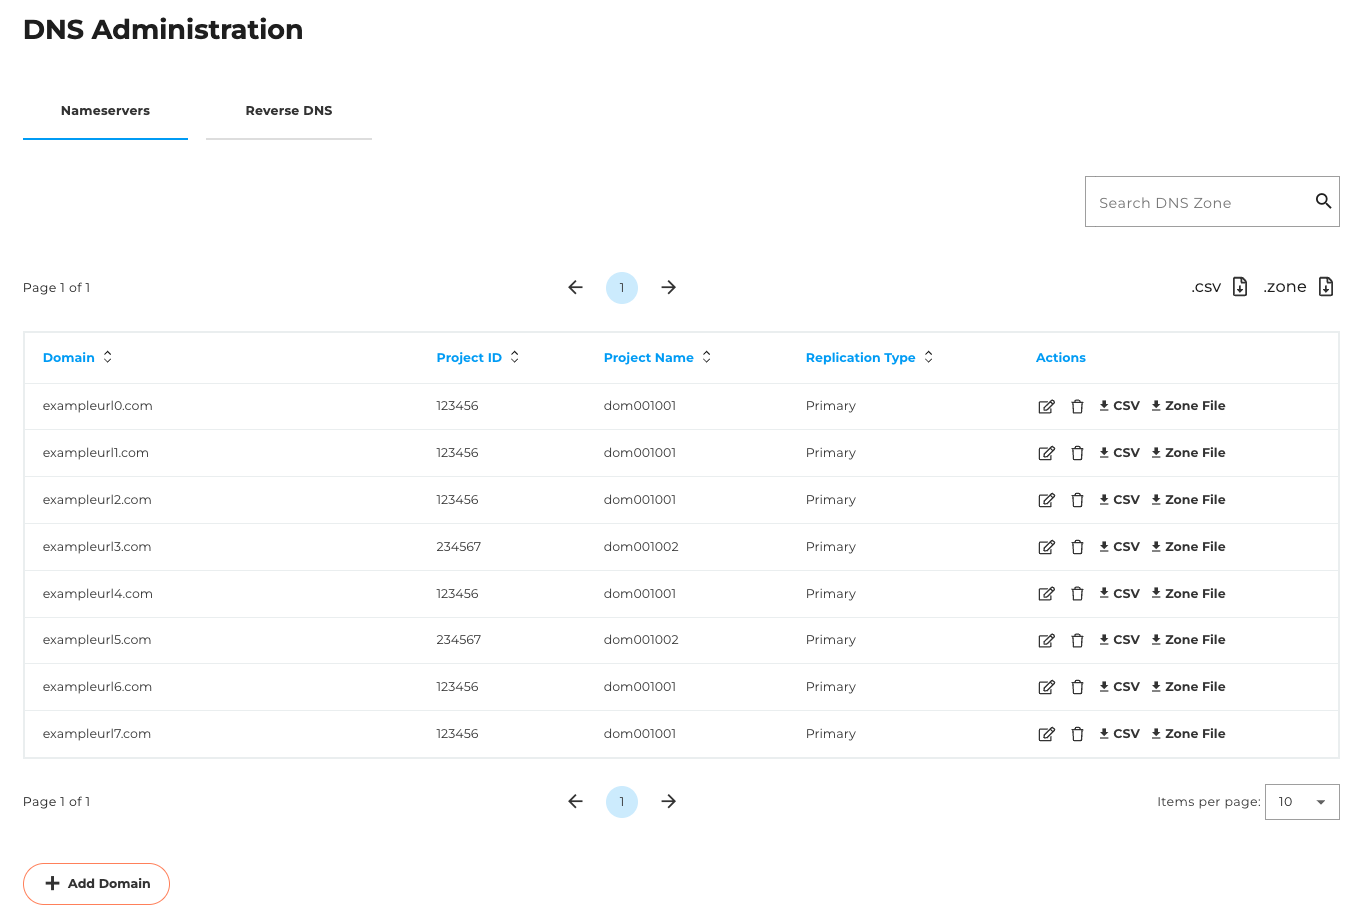
Summary table
All existing domains are listed in a table.
You can search for specific domains using the search field above the table.
The following actions are available for each domain:
- Edit: Manage the domain’s DNS entries

- Delete: Remove domain from DNS management

- Download as CSV: Export settings in CSV format

- Download as zone file: Export in classic zone file format

Add domain
The “Add domain” button takes you to the “Add DNS domain” page.

Add DNS domain
On this page, you can transfer an existing domain to DNS management – provided you already have a corresponding contract. If the desired domain does not yet exist, it can be set up via our support team by submitting a ticket.

Manage DNS entries (edit a domain)
When editing a domain, you will see a table with all associated DNS entries.
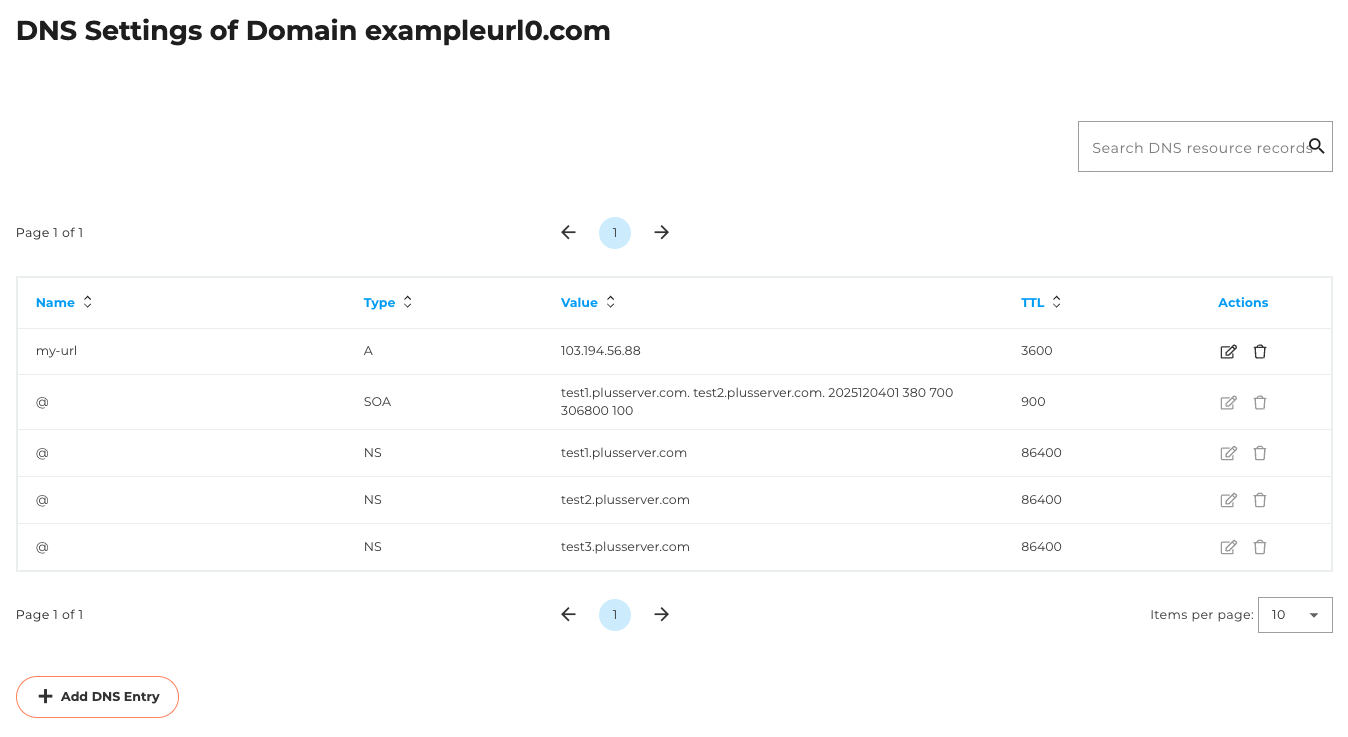
Features
- Search field for quickly finding individual entries
- For each DNS entry:
- Edit (editable fields: value and TTL)


- Delete the entry

- Edit (editable fields: value and TTL)
Add DNS entry
Clicking on the “Add DNS entry” button will display a new entry line at the top of the table. Enter the following values there:

- Name
- Type (e. g. A, AAAA, CNAME, MX, TXT etc.)
- Value
- TTL
On the right-hand side of the line, you can save the new entry or cancel the addition.
Reverse DNS
In the “Reverse DNS” tab, you can manage PTR entries for your IP addresses.
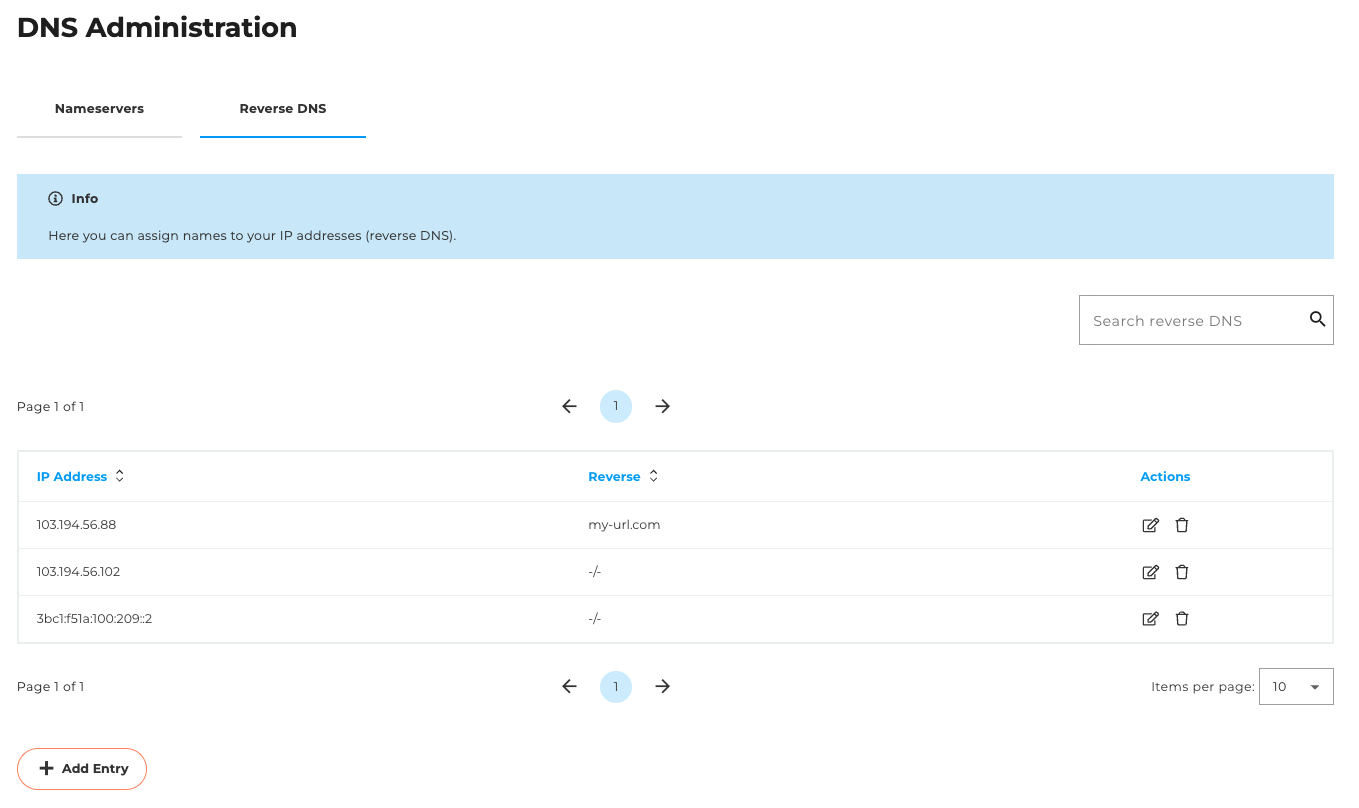
Summary table
- All existing reverse DNS entries are displayed in a table.
- A search field allows you to search for specific IP addresses or host names.
- The following actions are available for each entry:
Edit (takes you to the “Edit DNS reverse entry” page)

Delete the entry

Click on the “Add entry” button to go to the “Add DNS reverse entry” page.

Edit DNS reverse entry
On this page, you can change the settings of an existing PTR entry. The following can be edited:
- Host name
- TTL
The associated IP address cannot be changed.
Add DNS reverse entry
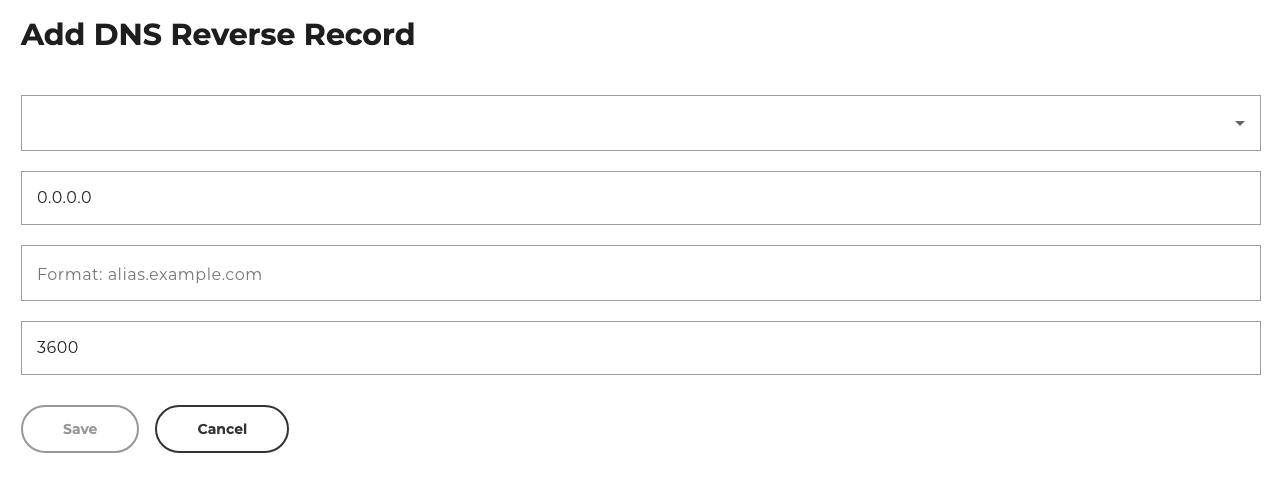
Form fields
- Network: Selection of the associated network range
- IP address: The address for which the PTR entry is to be created
- Host name: Target name to which the IP address should point
- TTL: Validity period of the entry (in seconds)
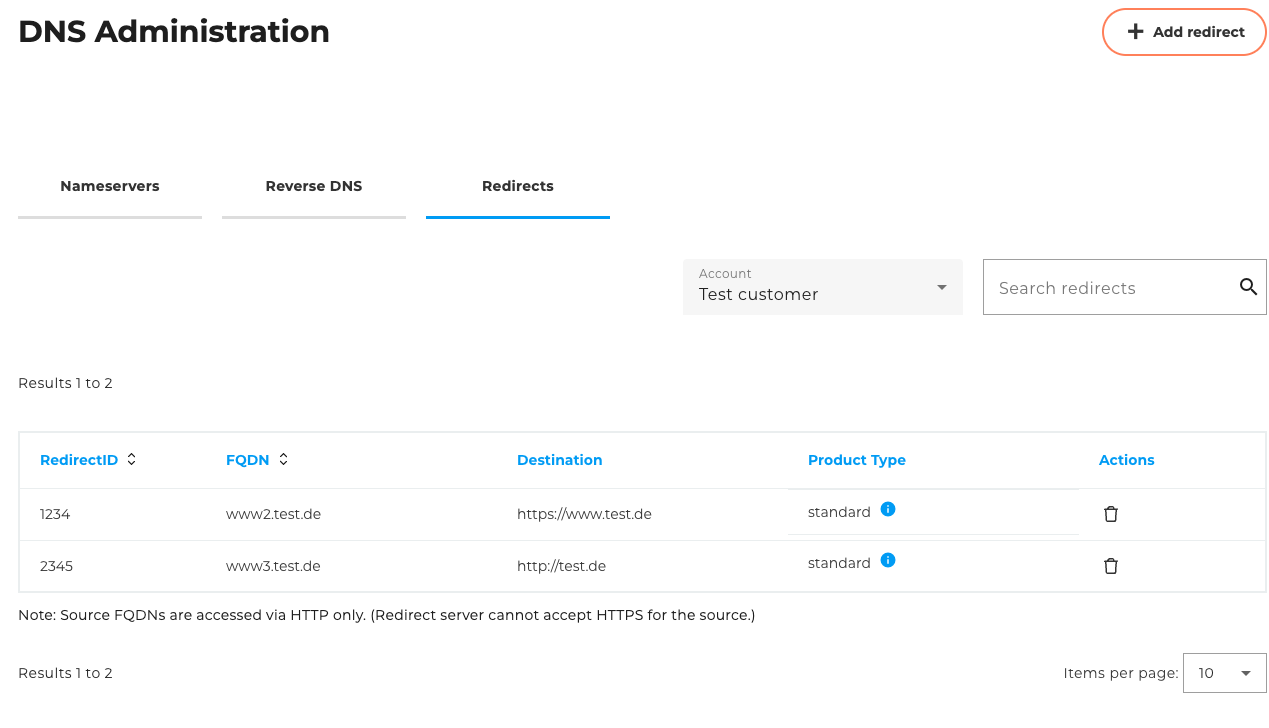
Redirects
Overview table
- All existing redirects are listed in a table.
A domain is always assigned to a single account. A customer account can have multiple subaccounts. Use the “Account” dropdown menu to select the account for which you want to view the redirects. - You can use the search bar above the table to search for specific domains.
- The following actions are available for each entry:
Delete: Deconfigure redirection
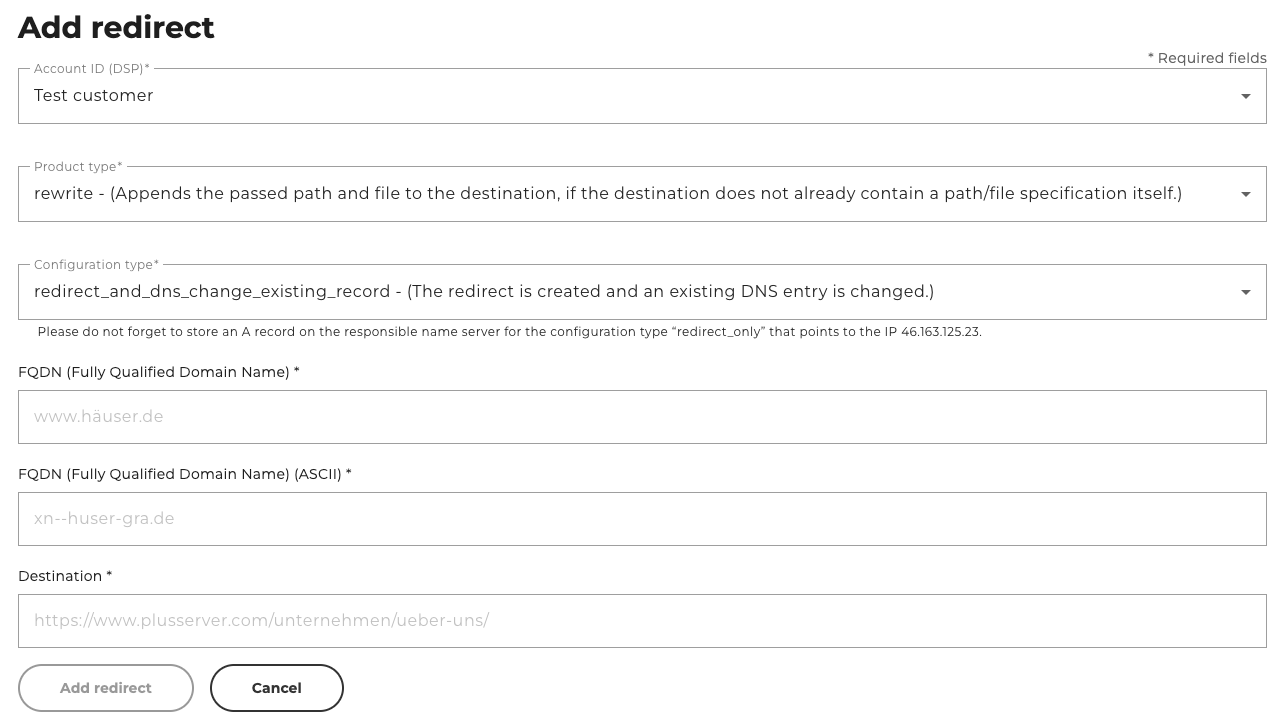
Add a Redirect
On this page, you can set up a redirect for an existing domain - provided you already have a valid contract. If the desired domain does not yet exist, it can be set up by submitting a support ticket.

AccountID (DSP)
Select the account to which the redirect should be assigned. You must select the account to which the source domain is also assigned.
Product type
The following types are available:
- standard - Changes the URL in the browser.
- hidden - Does not change the URL in the browser.
- rewrite - Appends the passed path and file to the destination, if the destination does not already contain a path/file specification itself.
Configuration type
The following types are available:
- redirect_only - Only the redirect is created.
- redirect_and_dns - The redirect is created and a DNS entry is created.
- redirect_and_dns_change_existing_record - The redirect is created and an existing DNS entry is changed.
FQDN
Here, you specify the source from which the redirect should originate. A fully qualified domain name must be provided.
For example, “www.häuser.de”
FQDN (ASCII)
Same as FQDN, but written in ACE notation.
For example, “www.nx-huser-gra.de”
Goal
Please enter the destination URL here. The destination should be a URL and begin with “https://”.
Please note that the underlying redirect server only accepts requests via HTTP. An encrypted connection via HTTPS is not established until the end of the redirect process.
Please note that for the configuration types redirect_and_dns and redirect_and_dns_change_existing_record, the zone must be located on the plusserver nameserver.
Please do not forget to add an A record on the relevant nameserver for the “redirect_only” configuration type, pointing to the IP address of the redirect server.