Creating instances
5 minute read
Launch instance
Using the button “Launch Instance” you can create one or more new instances and start them. A guided dialog helps you to go through all required steps. As soon as you have entered enough information for launching an instance, the button “Create Instance” becomes available and you can start your new instance(s). Asterisks (*) mark required information.
Keep in mind that shell access to the new instance is only possible via SSH key authentication. Thus you either need to create an SSH keypair during instance creation or upload your keypair beforehand. Clicking on “Launch Instance” opens a dialog, which will guide you through several steps that have to be completed to launch an instance:
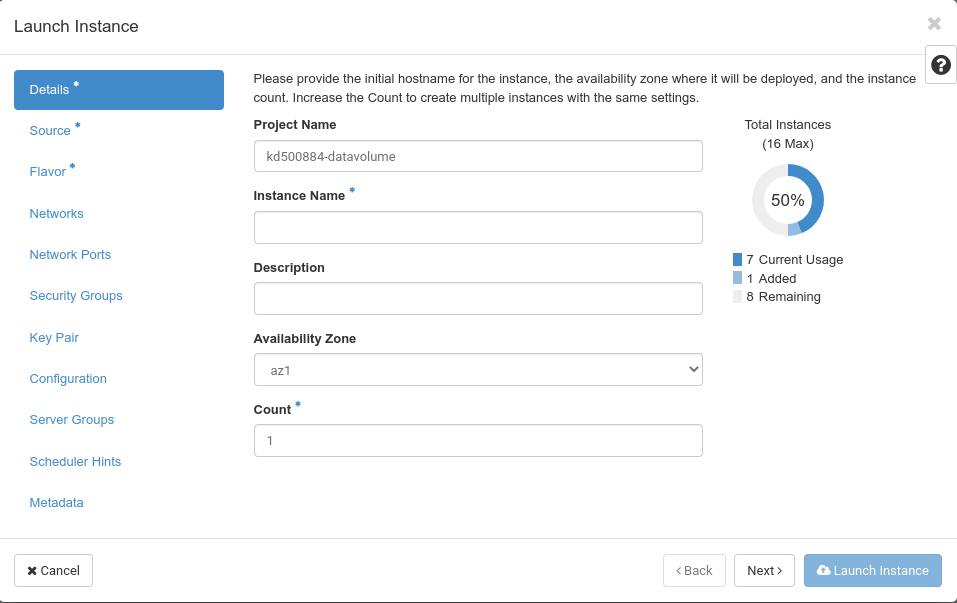
You need to give your new instance a name in the “Instance Name” field. The description is optional. There is only one “Availability Zone” you can choose. You can use the “Count” field to spawn several instances of the same type at the same time.
“Next”, you should define the “Source” of your instance. Basically, you choose which image your instance will be based on.

First, you choose whether your new instance will be booted from an image (you see a list of available items under “Available”), from an instance snapshot, from a volume or from a volume snapshot. If you choose an existing volume, you can only boot one instance from it. If you choose an image or a snapshot, you can boot more than one instance from it. You choose the item you want by clicking on on the little “up” arrow on the right.
Next, you define the “Volume Size” of the root volume of your new instance. If you do not set a value here (or one which is too small), the size will automatically be adjusted to the size of the image you choose.
The options on the right side ("Create New Volume" and “Delete Volume on Instance Deletion”) determine the lifecycle of the root volume of your instance. If you want your instance and its root volume to be deleted when the instance is deleted, you should choose not to create a new volume (the option to delete the volume on instance deletion will be disabled). If you have chosen to create a volume, you can choose to have the volume deleted on instance deletion. If you don’t choose this option, the root volume of the instance will “survive” the deletion of the instance (and consume storage and be billed).
Now - by clicking on “Next” - you have to choose the Flavor of your new instance. Flavors determine the “dimensions” of your new instance regarding the number of virtual CPUs, the amount of virtual memory and the size of the root disk.

Clicking on the little arrow on the left - in front of each flavor line - shows what impact the choice of that flavor has on your consumption. By clicking the “up” arrow, you choose to use this flavor for the instance creation. If the choice of a flavor would consume more resources than available in your quota, it is marked with a yellow “warning” exclamation mark.
Pluscloud open is responsible for the creation an management of the flavors.
Next, you need to choose the “Networks” you want your new instance to be connected to:

Depending on your network topology, you would choose one or more of the networks listed under “Available”.
“Security Groups” allows you to choose which security groups should be applied for your new instance:

The “default” security group would allow for basic access to your instance. Additional security groups could (dis)allow traffic to and from specific networks or specific ports. If you remove the default security group, you will only be able to access your new instance via VNC console.
The “Key Pair” menu enables you to create a new SSH public/private key pair by clicking on “Create Key Pair” or to import an existing key pair with “Import Key Pair” to be able to login to your new instance via secure shell (SSH).

When you create a key pair, you are presented with the private key, which you should save to your local workstation and protect from third-party eavesdropping. The public half of the key pair is saved in your OpenStack project. When you choose to import a “key pair” you only import the public part of your key pair. The private key remains in your posession.
You can also quickly create a new public/private key pair on the command line with ssh-keygen -t rsa -f cloud.key and then import the public key cloud.key.pub into your OpenStack project.
If you are using Windows you can use PuTTYgen to do the same thing - just make sure you select openSSH as the key format.
“Configuration” is a menu that allows you to upload and execute a script, that can be used to customize your instance after launch:

As many cloud images use cloud-init for customization these days, this option might be less commonly used than usual. Another option here is “Disk Partition”, which can be done in either “automatic” or “manual” mode. “Automatic” basically creates one partition per volume while “manual” lets you create more partitions per volume.
With "Server Groups", you can assign your new instance to an existing server group to allow your new instance to be created either next to other instances in that server group or explicitly not next to other instances in that group (affinity - anti-affinity).
If you want to add some “Scheduler Hints” in order to affect the placement of your new instance, you can either choose from the existing metadata catalog or create your own keys in the first row on the left:

Simply click “+” on a button from left to move it to the right to assign it to the new instance. Additional information is displayed in the box at the bottom of the menu.
Similar to this, you can add (more) metadata to your new instance in the “Metadata” menu.

There is a catalog of already existing metadata available. But you can alsow create your own keys in the “Custom” field. Just click “+” on the the desired item on the left to move it to the right.