Temporary URLs
Using Temporary URLs aka TempURL
5 minute read
pluscloud open provides Object Storage compatible With OpenStack’s Swift and Amazon’s S3 protocols. It is basically provided for “cloud native” use cases:
Object Storage is managed either through the web GUI or with a CLI client. You can find your object storage under “Object Store” and then “Containers” in your Horizon menu. “Containers” in Swift is the equivalent of “buckets” is S3.

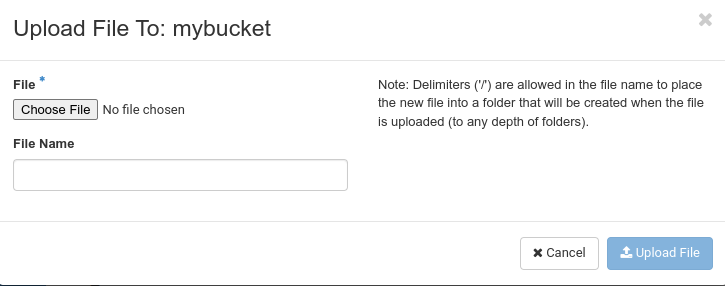
You can even up- and download content into your containers/buckets. Just click on the little “upload” button and choose a file from your computer.

Then click on “Upload File”. Objects can be downloaded with the “Download” button on the right. But there are other options in that menu.

“View Details” provides information about the object such as size, content type, etc. “Edit” allows you to change the content of this object. However, there is no in-place editing for Object Storage - the new content is uploaded with the old object name.
Furthermore, you can copy an object into another container/bucket by selecting “Copy”. “Delete” obviously deletes the object.
You can create a folder in your container/bucket (instead of uploading an object) by clicking on “+Folder”. Objects can be uploaded, copied, edited and deleted in these subfolders exactly as in other containers/buckets. But beware: These subfolders are not like subfolders in a file system. The folder structure is only simulated by adding “/” to the folder name.
There are serveral options to manage your Object Storage from the command line. As mentioned above, our Object Storage is compatible with OpenStack Swift and Amazon S3. Thus, you should be able to use command line tools that support the one or the other.
Obviously, the OpenStackClient itself supports managing containers to a certain extend. If you have your OpenStackClient configured correctly, you can use the openstack container commands to manage your Object Storage containers/buckets:
/configuration # openstack container list
+--------+
| Name   |
+--------+
| first  |
| foobar |
+--------+
/configuration # openstack container show first
+----------------+---------------------------------------+
| Field          | Value                                 |
+----------------+---------------------------------------+
| account        | AUTH_d474d55f24a3a97e92cc39b7dd469c14 |
| bytes_used     | 0                                     |
| container      | first                                 |
| object_count   | 0                                     |
| read_acl       | .r:*,.rlistings                       |
| storage_policy | default-placement                     |
+----------------+---------------------------------------+
As the openstack container command does not allow uploads, you have to use the Swift client to upload objects to your Object Storage:
/configuration # swift upload --help
Usage: swift upload [--changed] [--skip-identical] [--segment-size <size>]
                    [--segment-container <container>] [--leave-segments]
                    [--object-threads <thread>] [--segment-threads <threads>]
                    [--meta <name:value>] [--header <header>] [--use-slo]
                    [--ignore-checksum] [--object-name <object-name>]
                    <container> <file_or_directory> [<file_or_directory>] [...]

Uploads specified files and directories to the given container.

Positional arguments:
  <container>           Name of container to upload to.
  <file_or_directory>   Name of file or directory to upload. Specify multiple
                        times for multiple uploads. If "-" is specified, reads
                        content from standard input (--object-name is required
                        in this case).

Optional arguments:
  -c, --changed         Only upload files that have changed since the last
                        upload.
  --skip-identical      Skip uploading files that are identical on both sides.
  -S, --segment-size <size>
                        Upload files in segments no larger than <size> (in
                        Bytes) and then create a "manifest" file that will
                        download all the segments as if it were the original
                        file.
  --segment-container <container>
                        Upload the segments into the specified container. If
                        not specified, the segments will be uploaded to a
                        <container>_segments container to not pollute the
                        main <container> listings.
  --leave-segments      Indicates that you want the older segments of manifest
                        objects left alone (in the case of overwrites).
  --object-threads <threads>
                        Number of threads to use for uploading full objects.
                        Default is 10.
  --segment-threads <threads>
                        Number of threads to use for uploading object segments.
                        Default is 10.
  -m, --meta <name:value>
                        Sets a meta data item. This option may be repeated.
                        Example: -m Color:Blue -m Size:Large
  -H, --header <header:value>
                        Adds a customized request header. This option may be
                        repeated. Example: -H "content-type:text/plain"
                        -H "Content-Length: 4000".
  --use-slo             When used in conjunction with --segment-size it will
                        create a Static Large Object instead of the default
                        Dynamic Large Object.
  --object-name <object-name>
                        Upload file and name object to <object-name> or upload
                        dir and use <object-name> as object prefix instead of
                        folder name.
  --ignore-checksum     Turn off checksum validation for uploads.
There are several options for managing your Object Storage via the S3 protocol, as well. One is S3cmd, which is available for various platforms. The other one is AWS CLI - a “universal command line interface for Amazon Web Services”, which we have already covered in our tutorial “OpenStack Object Storage as a Backend for Terraform Statefiles”.
For S3cmd you need a configuration file .s3cfg which you can create with assistance by executing s3cmd --configure. As previously mentioned, you can create your credentials for accessing Object Storage with openstack ec2 credentials create, list them with openstack ec2 credentials list and see them with openstack ec2 credentials show <accesskey>. You must have them prepared to configure s3cmd.
After the configuration you should have an .s3cfg file similar to this:
[default]
access_key = <youraccesskey>
secret_key = <yoursecretkey>
enable_multipart = True
multipart_chunk_size_mb = 50
use_https = True
host_base = https://prod1.api.pco.get-cloud.io:8080
host_bucket = https://prod1.api.pco.get-cloud.io:8080
signurl_use_https = True
socket_timeout = 600
If all is correct, executing s3cmd ls s3:// should list your Object Storage contents.
Using Temporary URLs aka TempURL