Virtual Networks
4 minute read
Virtual Networks enable you to connect multiple dedicated servers via a private network connection.
This requires the following steps:
- Creating the Virtual Network in CloudHub
- Adding servers to the Virtual Network
- Configuration of VLANs on server itself
In CloudHub
Creating a Virtual Network
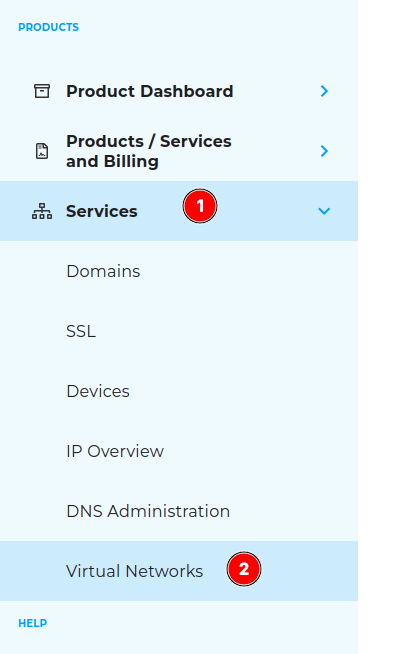
To deploy a Virtual Network in CloudHub select “Services” (1) in the navigation panel to the side and choose “Virtual Networks” (2).
Now you should have the option “Create Virtual Network” in the upper section of the page.

This is where you will be prompted for configuration options of the Virtual Network.
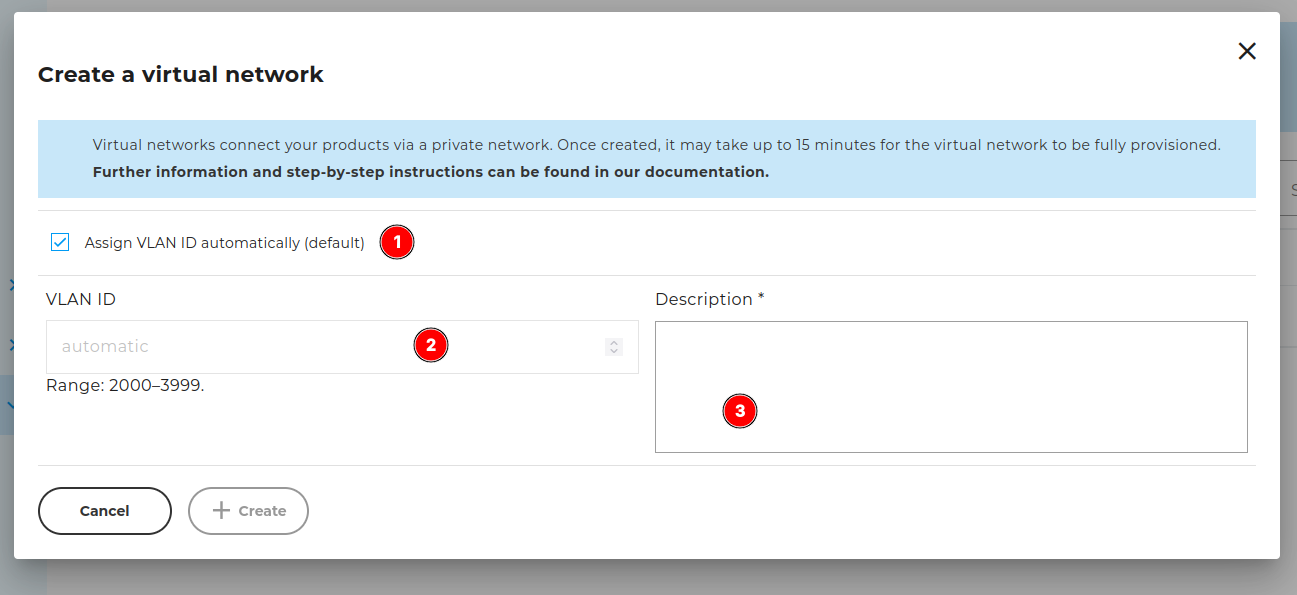
The following options are available for configuration:
- Automatically assign VLAN ID: If this is set, an ID for the Virtual Network’s VLAN will be picked automatically.
- If you don’t enable automatic assignment, you can pick an ID of your choice from the given range here.
- This is where you can add a free-form description to more easily identify your network.
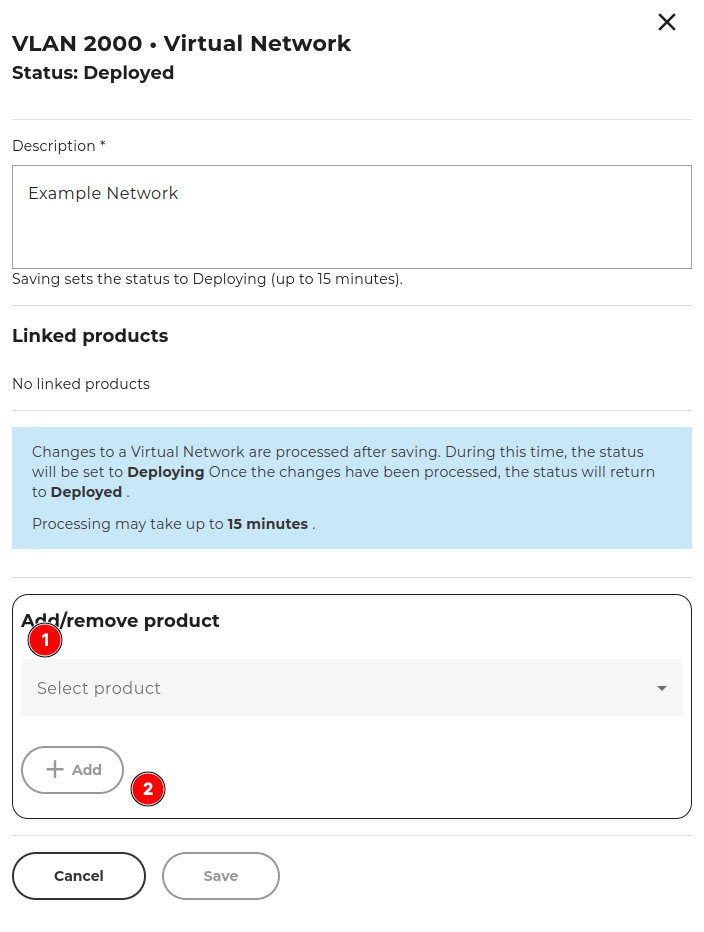
After saving the Virtual Network’s configuration, you will be redirected to an overview page which provides information about your network (1), lists the attached devices (2) and offers further actions (3).

The button at (4) allows for modification of the Virtual Network, which is also how you add servers to it.
Adding servers
To connect multiple servers using a Virtual Network, select the “Edit” action of a Virtual Network on the overview page (see above).
Once you opened the modification dialogue of a Virtual Network, a sub-menu will present you with products to add to it (1). Confirm your choice by clicking “add” (2):
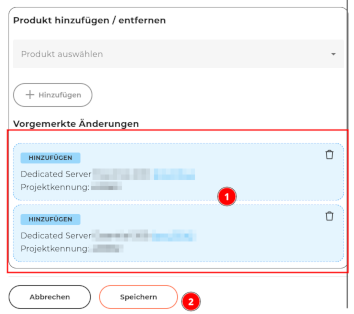
Simply select all servers that should be added. If you are satisfied with the list of selected servers (1), simply select “Save” (2).
Afterward you will be redirected to the overview page providing information about your Virtual Networks.
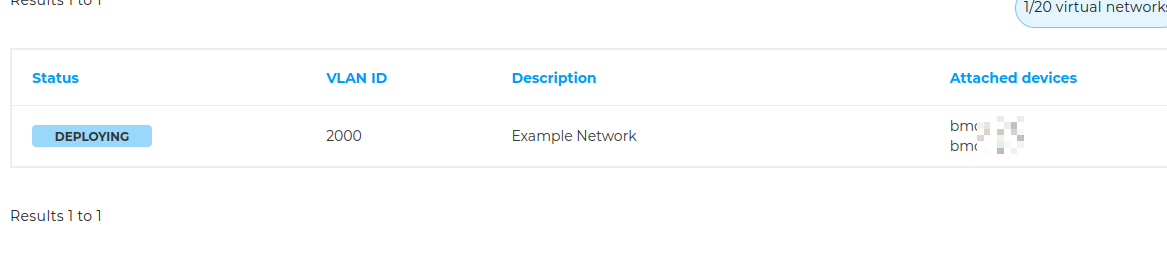
After a few minutes the network’s configuration should be applied and its state should change to “Deployed”.
Configuration will proceed on the server itself.
On the machine
Now that the infrastructure part of the Virtual Network has been set up, it must be configured on each of the involved systems.
On the technical level, this is done via a VLAN on the preexisting physical connection of your system.
The following examples will assume:
- a manually selected VLAN ID of 2000.
- the network 192.168.100.0/24 being configured.
Debian
With Debian the configuration of the network connection happens via configuration files in /etc/network/interfaces.d.
For further information refer to the official manual page provided by Debian.
You could for example create the file /etc/network/interfaces.d/60-vlan2000 with the following content:
auto bond0.2000
iface bond0.2000 inet static
    vlan-raw-device bond0
    address 192.168.100.1
    netmask 255.255.255.0
Once the configuration file is in place, restarting the networking service via systemctl restart networking is everything that should be needed to apply it.
RHEL
RHEL makes use of NetworkManager, which is typically configured via configuration files in /etc/NetworkManager/system-connections.
For further details refer to the official documentation of NetworkManager.
You could for example create the file /etc/NetworkManager/system-connections/bond0-vlan2000.nmconnection.
Make sure the file’s permissions are 600, or NetworkManager will refuse to evaluate it.
[connection]
id=VLAN-2000
type=vlan
interface-name=vlan2000

[vlan]
id=2000
parent=bond0

[ipv4]
method=manual
addresses=192.168.100.1/24
To apply the new configuration, run sudo nmcli c reload.
Ubuntu
With Ubuntu the configuration of the network connection happens via Netplan.
Additional configuration files should be placed in /etc/netplan/.
For futher details refer to the official Netplan documentation.
You could for example create the file /etc/netplan/60-vlan2000.yaml with the following content:
network:
  vlans:
    bond0.2000:
      id: 2000
      link: bond0
      addresses:
        - 192.168.100.1/24
You can use sudo netplan get to view the updated configuration.
To apply the configuration you need to run sudo netplan apply.
Further Tweaks
Jumboframes
If the traffic you intend to send via your Virtual Network requires an MTU greater than the default of 1500 bytes, you will need to configure that manually. In this example we’re going to configure an MTU of 9000 bytes.
How this is done largely depends on the OS, so please refer to the respective section below.
Debian
For Debian systems you simply place another configuration file in /etc/network/interfaces.d/55-bond0-mtu:
iface bond0 inet manual
  mtu 9000
Afterwards all you need to do is run sudo systemctl restart networking for the changes to take effect.
RHEL
With a RHEL system, all you need to do is modify the existing connection using the command:
sudo nmcli connection "cloud-init bond0" modify ethernet.mtu 9000
Depending on your existing connection you might need to adjust the connections name.
Now all that’s left is running sudo systemctl restart NetworkManager and the MTU should be properly set.
Ubuntu
For Ubuntu you can just add another configuration file, for example /etc/netplan/65-vlan2000-mtu.yaml:
network:
  vlans:
    vlan2000:
      mtu: 9000
Now all that’s left is running sudo netplan apply and the MTU should be properly set.